Industrial Boiler Problems: Troubleshooting Guide Tips

Industrial boiler problems can quickly disrupt production, increase fuel costs, damage equipment, and create serious safety risks if they are not identified early. Many operators only notice boiler issues when steam pressure drops, alarms appear, fuel consumption rises, or shutdowns occur. The best solution is to understand the most common industrial boiler problems, recognize their symptoms, and follow a structured troubleshooting process before minor faults become expensive failures.
Common industrial boiler problems include low steam pressure, poor combustion, water level instability, scale buildup, corrosion, burner failure, feedwater pump issues, safety valve leakage, abnormal noise, and excessive fuel consumption. Troubleshooting usually starts with checking water level, fuel supply, combustion air, pressure controls, feedwater quality, blowdown practice, alarms, and visible leaks before calling qualified boiler service technicians for deeper inspection.
A reliable troubleshooting approach helps plant managers, boiler operators, and maintenance teams reduce downtime, improve safety, and extend boiler service life. The following article outline focuses on practical problems users frequently face in industrial boiler operation and how to solve them systematically.
What Are the Most Common Industrial Boiler Problems and Troubleshooting Priorities?
Industrial boiler problems rarely appear as isolated failures; they usually develop from small operating changes that are not detected or corrected early enough. A burner lockout, low-water alarm, high stack temperature, poor steam pressure, leaking valve, pump vibration, scaling issue, or unstable water chemistry can quickly become lost production, emergency repair cost, safety risk, fuel waste, or pressure-equipment damage. The solution is to troubleshoot industrial boilers by priority: first protect personnel and equipment safety, then stabilize steam supply, identify the root cause, correct efficiency losses, and prevent repeat failure through better maintenance planning.
The most common industrial boiler problems include low water level, poor water treatment, scaling, corrosion, burner ignition failure, flame instability, high stack temperature, pressure fluctuation, feedwater pump failure, excessive blowdown, steam leaks, failed steam traps, control valve sticking, sensor drift, and safety-device faults. The correct troubleshooting priority is safety first, then water level and pressure control, combustion reliability, feedwater supply, water chemistry, heat-transfer condition, steam distribution, controls and instrumentation, and finally long-term efficiency optimization.
For plant managers, boiler operators, maintenance supervisors, and procurement teams, the best troubleshooting method is not guessing which part failed. The best method is a structured diagnostic process that connects symptoms with operating evidence. As an industrial boiler manufacturer and system supplier, we recommend using a priority-based troubleshooting framework: isolate immediate hazards, review alarm history, verify critical instruments, compare fuel-steam-water data, inspect mechanical components, correct root causes, document the repair, and update preventive or predictive maintenance plans.
Low water level is one of the most serious industrial boiler problems because heating surfaces can overheat if they are not properly covered by water.True
Adequate water level is essential for safe boiler operation. Low water can expose heat-transfer surfaces, causing overheating, tube damage, shutdown, or severe safety risk.
High stack temperature always means the burner needs more fuel.False
High stack temperature usually indicates heat-transfer loss, excess air, soot, scale, fouling, economizer problems, or operating-condition changes. Adding more fuel does not solve the root cause and may worsen efficiency or safety risk.
Troubleshooting Priority 1: Immediate Safety Conditions
The first priority in industrial boiler troubleshooting is always safety. Before looking for energy savings or minor maintenance faults, the operator must determine whether the boiler can continue operating safely. Critical safety-related symptoms include low water level, high pressure, flame failure, fuel leakage, furnace pressure abnormality, repeated burner lockouts, unusual vibration, steam leakage, abnormal smell, overheating, safety valve lifting, electrical faults, and control-system alarms. If any condition suggests immediate danger, the correct action is not extended troubleshooting while the boiler continues firing; the correct action is to follow site safety procedures, reduce load if appropriate, isolate equipment when required, and involve qualified personnel.
Low water level deserves special attention because it is one of the most dangerous boiler conditions. The apparent symptom may be a low-water alarm, unstable gauge glass, rapid level movement, feedwater flow interruption, or repeated level-control cycling. The root cause may be feedwater pump failure, blocked strainer, faulty level transmitter, stuck feedwater valve, low deaerator level, condensate return interruption, sudden steam demand, or operator error. Troubleshooting should begin by verifying the actual water level through approved methods, checking feedwater pump operation, confirming feedwater valve response, reviewing recent load changes, and inspecting level controls. Never assume that a low-water alarm is “only a sensor problem” until the actual water condition has been verified safely.
High pressure and safety valve lifting also require urgent investigation. A safety valve event may result from sudden load reduction, failed pressure control, burner modulation fault, downstream valve closure, poor boiler sequencing, or incorrect pressure setting. Troubleshooting should include reviewing the pressure trend, burner firing rate, steam demand, control valve position, pressure transmitter accuracy, and downstream steam system status. Frequent safety valve lifting is not normal operation; it indicates that the boiler system is not controlling pressure correctly or that operating conditions are unstable.
Common Industrial Boiler Problems and First Troubleshooting Priorities
| Problem | Typical Symptoms | Likely Causes | Troubleshooting Priority | First Corrective Action |
|---|---|---|---|---|
| Low water level | Low-water alarm, unstable gauge glass, burner trip | Feedwater pump failure, valve sticking, transmitter fault, sudden load increase | Critical safety | Verify water level and feedwater supply immediately |
| High pressure | High-pressure alarm, safety valve lifting | Control failure, load rejection, valve closure, poor sequencing | Critical safety | Reduce firing safely and inspect pressure control loop |
| Burner ignition failure | Failed start, lockout, no flame signal | Igniter fault, fuel pressure issue, dirty flame scanner, air damper fault | High | Follow burner reset procedure and inspect ignition sequence |
| Flame instability | Flame failure, pulsation, unstable combustion | Fuel-air imbalance, fan issue, dirty burner, poor draft | High | Inspect fuel pressure, air supply, flame scanner, and burner setup |
| High stack temperature | Rising flue gas temperature, poor efficiency | Soot, scale, excess air, economizer fouling | Medium-high | Compare stack temperature with load, O₂, and feedwater temperature |
| Scaling | Reduced heat transfer, high stack temperature, tube overheating | Poor water treatment, excessive hardness, insufficient blowdown | High | Test water chemistry and inspect heat-transfer surfaces |
| Corrosion | Leaks, iron deposits, tube thinning | Oxygen, low pH, condensate contamination, poor treatment | High | Review water chemistry and inspect affected areas |
| Feedwater pump problem | Low feedwater pressure, vibration, motor current increase | Bearing wear, cavitation, strainer blockage, seal failure | High | Check suction condition, vibration, current, and discharge pressure |
| Excessive blowdown | High water use, fuel waste, chemical loss | Conductivity sensor fault, poor control, contamination | Medium | Verify conductivity and blowdown valve operation |
| Steam trap failure | Low condensate return, steam loss, water hammer | Trap stuck open or closed, dirt, wear | Medium | Survey traps and repair failed units |
| Control valve sticking | Pressure hunting, slow response, unstable level | Actuator fault, positioner issue, debris, wear | Medium-high | Compare command signal with actual valve position |
| Sensor drift | Conflicting readings, false alarms, poor control | Calibration loss, fouling, wiring issue | Medium-high | Validate sensor against reference measurement |
Troubleshooting Priority 2: Water Level, Feedwater Supply, and Boiler Water Control
After immediate safety has been addressed, the next troubleshooting priority is the feedwater system because boiler water supply protects the pressure vessel and heating surfaces. Feedwater problems may appear as low water alarms, unstable level control, frequent pump starts, pump vibration, poor deaerator performance, low discharge pressure, cavitation noise, or excessive control valve movement. The root cause may not be the pump itself. Many feedwater problems originate from suction restrictions, low feedwater tank level, high feedwater temperature causing cavitation, blocked strainers, leaking check valves, faulty level transmitters, control valve stiction, poor condensate return, or poor control tuning.
A practical troubleshooting sequence starts with the basics: verify feedwater source, tank level, suction valve position, strainer condition, pump rotation, discharge pressure, motor current, and valve response. Then review whether the problem occurs at all loads or only during peak steam demand. If the boiler level is stable at low load but unstable at high load, the issue may be pump capacity, suction condition, valve sizing, deaerator performance, or sudden process demand. If the level signal is noisy but feedwater and steam flow appear normal, the problem may be transmitter impulse line blockage, sensor drift, electrical noise, or poor signal filtering. If the pump current rises while discharge pressure drops, cavitation or mechanical wear may be likely. If discharge pressure is good but boiler level does not recover, the feedwater control valve, check valve, or piping restriction should be inspected.
Feedwater troubleshooting should also include water temperature and deaeration. Cold feedwater reduces efficiency and increases thermal stress. Poor deaeration can increase oxygen-related corrosion risk. If condensate return temperature drops suddenly, the boiler may consume more fuel and experience greater makeup water demand. If oxygen corrosion is suspected, the maintenance team should review deaerator operation, chemical dosing, condensate return integrity, and dissolved oxygen control practices where applicable.
Troubleshooting Priority 3: Combustion and Burner Reliability
Burner problems are among the most visible industrial boiler failures because they often cause immediate lockout or unstable steam supply. Common symptoms include failed ignition, flame failure, repeated lockouts, unstable flame, rumbling, pulsation, high oxygen, high carbon monoxide where monitored, smoke, soot, high stack temperature, poor modulation, and delayed response to load changes. Burner troubleshooting must be disciplined because combustion involves fuel, air, ignition, flame detection, draft, and safety interlocks.
The correct first step is to review the burner management sequence and identify where the failure occurs. Does the burner fail before ignition, during pilot, during main flame establishment, after flame proving, or during modulation? A failure before ignition may involve air proving switch, purge sequence, fuel valve proof, damper position, fan operation, or interlock status. A failure during ignition may involve ignition transformer, electrode position, pilot fuel pressure, spark quality, flame scanner, or air setting. A failure during main flame operation may involve fuel pressure instability, dirty burner components, poor air-fuel ratio, draft issues, flame scanner fouling, or control instability.
Combustion troubleshooting should never be reduced to random burner adjustments. Excess air, oxygen readings, stack temperature, flame signal, fuel pressure, fan speed, damper position, and firing rate must be reviewed together. If oxygen is too high, the boiler may be wasting fuel through excess air. If oxygen is too low, combustion may become unsafe or incomplete. If stack temperature rises while oxygen is stable, heat-transfer fouling may be more likely than burner air setting. If the flame signal weakens gradually, the flame scanner may be dirty or misaligned. If ignition failures occur mainly after long standby periods, moisture, fuel pressure, purge timing, or electrode condition may be involved.
| Burner Symptom | Possible Cause | Diagnostic Check | Priority |
|---|---|---|---|
| No ignition | Igniter fault, no pilot fuel, failed interlock | Check ignition transformer, electrodes, pilot valve, permissives | High |
| Flame failure after ignition | Weak flame signal, poor fuel pressure, air setting issue | Review scanner signal, fuel pressure, pilot/main flame transition | High |
| Repeated burner lockout | Dirty scanner, unstable fuel, damper issue, safety interlock | Review lockout history and sequence timing | High |
| High oxygen | Excess air, damper misalignment, air leakage, actuator drift | Compare O₂ with firing rate and damper position | Medium-high |
| Soot formation | Insufficient air, poor atomization, dirty burner, fuel issue | Inspect burner, combustion readings, fuel quality | High |
| Pulsation or rumbling | Combustion instability, draft issue, poor burner setup | Inspect draft, fan, burner settings, furnace conditions | High |
| Slow modulation | Actuator wear, control tuning issue, linkage problem | Compare control signal with actuator response | Medium-high |
Troubleshooting Priority 4: Water Treatment, Scaling, and Corrosion
Water treatment problems are some of the most expensive boiler problems because they can damage the pressure vessel internally while the boiler appears to operate normally. Scaling reduces heat transfer and can cause overheating of tubes or furnace surfaces. Corrosion weakens metal and can lead to leaks, tube thinning, and pressure-part failure. Foaming and carryover can contaminate steam and damage downstream equipment. These problems often develop gradually, so troubleshooting must include water chemistry records, blowdown operation, condensate quality, makeup water quality, and inspection findings.
Scaling is commonly associated with hardness leakage, poor softener performance, inadequate chemical treatment, insufficient blowdown, high dissolved solids, or improper operating practices. Symptoms may include high stack temperature, reduced steam output, poor heat transfer, localized overheating, and deposits found during inspection. Troubleshooting should include checking feedwater hardness, boiler water conductivity, blowdown rate, chemical dosing, softener regeneration, makeup water percentage, and condensate return contamination. If scale is suspected, the boiler should be inspected by qualified personnel and cleaned according to approved procedures.
Corrosion troubleshooting focuses on oxygen, pH, condensate contamination, poor chemical dosing, and improper layup. Symptoms may include leaks, reddish or black deposits, pitting, iron in condensate, tube thinning, or recurring pipe failures. A common mistake is treating a leak as only a welding or tube-replacement issue while ignoring the water chemistry that caused it. The correct troubleshooting priority is to repair the immediate damage and then correct the chemical or operational condition that caused corrosion. Otherwise, the same failure will return.
Blowdown must also be evaluated carefully. Too little blowdown can increase dissolved solids and carryover risk. Too much blowdown wastes fuel, water, and chemicals. If conductivity is high despite blowdown, investigate makeup water quality, chemical treatment, condensate contamination, and blowdown valve function. If conductivity is low but blowdown is frequent, the plant may be wasting energy due to incorrect setpoints, sensor drift, or manual blowdown habits.
Troubleshooting Priority 5: Heat-Transfer Loss and High Stack Temperature
High stack temperature is a common industrial boiler problem and one of the clearest signs of energy loss. However, it must be interpreted correctly. Stack temperature changes with load, feedwater temperature, excess air, fuel type, and boiler design. A rising stack temperature at the same load and similar feedwater temperature often suggests soot, scale, fouling, or economizer performance loss. If stack temperature rises together with oxygen, excess air may be increasing the amount of hot gas leaving the boiler. If stack temperature rises while oxygen remains stable, heat-transfer surface contamination may be more likely.
Troubleshooting high stack temperature should begin by comparing current operating data with historical baseline data. Review firing rate, steam load, feedwater temperature, oxygen, economizer inlet/outlet temperature, blowdown, water chemistry, and recent maintenance history. Inspect fireside surfaces for soot, ash, or fouling. Review fuel quality and burner atomization where applicable. Inspect waterside surfaces if scaling is suspected. Check whether the economizer is bypassed, fouled, leaking, or suffering from poor flow. A clean and properly operating economizer should increase feedwater temperature by recovering heat from flue gas; if this temperature rise declines, heat recovery is being lost.
High stack temperature is not only an efficiency issue. If caused by scale, it may indicate overheating risk. If caused by soot, it may indicate poor combustion and possible fire-side safety concern. If caused by excess air, it may show poor burner control. Therefore, troubleshooting should address both energy cost and reliability risk.
Troubleshooting Priority 6: Steam Pressure Problems and Load Instability
Steam pressure problems usually appear as pressure hunting, slow pressure recovery, frequent burner cycling, safety valve lifting, low process pressure, or unstable production quality. The root cause may be inside the boiler controls or outside in the steam system. Common causes include sudden process demand changes, undersized boiler capacity, oversized boiler causing short cycling, poor burner modulation, pressure transmitter drift, control valve sticking, incorrect PID tuning, steam leaks, failed traps, poor boiler sequencing, or downstream pressure-reducing station problems.
Troubleshooting should begin with trend review. Does pressure drop when steam demand increases normally, or does it drop because the burner fails to respond? Does pressure overshoot after demand falls? Does the burner cycle frequently at low load? Does one process user create large pressure swings? Does the pressure transmitter agree with local gauges? Are control valves responding correctly? In multi-boiler plants, are boilers sequenced properly, or are they fighting each other?
If pressure instability is caused by process demand, the solution may involve steam accumulator capacity, better sequencing, process scheduling, pressure-control tuning, or distribution improvements. If caused by burner response, inspect actuator movement, fuel pressure, fan operation, and combustion controls. If caused by valve stiction, perform valve diagnostics and stroke testing. If caused by sensor drift, calibrate pressure transmitters before changing control settings.
Troubleshooting Priority 7: Steam Leaks, Failed Traps, and Condensate Return Problems
Many boiler problems are actually steam-system problems. A boiler may work harder because steam is being wasted downstream. Steam leaks, failed traps, damaged insulation, poor condensate return, water hammer, and leaking heat exchangers can increase fuel consumption, makeup water, chemical use, and boiler load. If the boiler seems inefficient but combustion and heat-transfer surfaces are acceptable, the steam distribution system should be inspected.
Failed steam traps are especially common. A trap failed open wastes live steam and reduces condensate return. A trap failed closed can cause poor heating, condensate backup, water hammer, and process problems. Symptoms include unusually hot condensate return lines, low condensate return percentage, increasing makeup water, water hammer, poor process heating, and rising fuel use. Troubleshooting should include trap temperature survey, ultrasonic testing where available, condensate return review, and visual inspection of discharge conditions.
Condensate return problems affect both cost and reliability. Hot condensate contains useful heat and treated water. Losing it forces the boiler to heat cold makeup water and increases treatment demand. If feedwater temperature drops, check condensate pumps, receiver tanks, return lines, steam traps, process heat exchangers, and contamination isolation systems. If condensate is contaminated with oil, chemicals, or hardness, it may need to be diverted until the source is found.
Troubleshooting Priority 8: Controls, Sensors, and Instrumentation
Modern industrial boilers depend heavily on accurate instrumentation. Sensor drift or control problems can create symptoms that look like mechanical failure. A faulty oxygen analyzer can lead to poor combustion decisions. A drifting level transmitter can cause unstable feedwater control. A pressure transmitter error can cause burner modulation problems. A stuck valve positioner can cause pressure hunting. A failed temperature sensor can mislead efficiency calculations. Therefore, troubleshooting must include instrument validation.
A common rule is to compare related signals. Steam flow, fuel flow, firing rate, pressure, and feedwater flow should make sense together. If one measurement changes but related variables do not, the measurement may be wrong. If oxygen readings change but stack temperature, flame quality, and fuel-air position do not support the change, check analyzer calibration. If water level appears unstable but steam and feedwater flow are steady, check level instrumentation. If pressure control is unstable, compare transmitter readings with local gauges and review valve response.
Instrumentation troubleshooting should include wiring, impulse lines, sensor fouling, calibration records, grounding, electrical noise, control logic, and signal scaling. Many repeated boiler problems are not solved because teams replace mechanical parts while ignoring inaccurate instruments.
Troubleshooting Priority 9: Maintenance Planning and Repeat-Failure Prevention
After the immediate fault is corrected, the final troubleshooting priority is preventing recurrence. This is where many boiler plants fail. They repair the symptom but do not remove the cause. A pump bearing is replaced, but cavitation remains. A burner is reset, but fuel pressure instability remains. A tube is repaired, but water chemistry remains poor. A valve is replaced, but debris remains in the line. A sensor is calibrated, but no calibration schedule is created. Repeat failures are expensive because they consume labor, parts, downtime, and operator confidence.
A good troubleshooting report should answer five questions: What symptom occurred? What was the verified root cause? What corrective action was completed? What evidence confirms the repair worked? What preventive or predictive action will stop recurrence? This information should be recorded in the maintenance system and reviewed during planning.
| Troubleshooting Stage | Main Question | Recommended Action | Expected Result |
|---|---|---|---|
| Safety check | Is the boiler safe to operate? | Verify pressure, water level, flame status, fuel safety, alarms | Prevents unsafe troubleshooting |
| Symptom confirmation | What exactly is happening? | Review alarms, trends, operator observations | Avoids guessing |
| Critical system review | Is water, pressure, and combustion stable? | Check feedwater, burner, pressure controls | Stabilizes operation |
| Root-cause analysis | Why did the symptom occur? | Compare process data, inspect components, validate sensors | Prevents wrong repairs |
| Corrective action | What must be repaired or adjusted? | Clean, tune, calibrate, repair, replace, or reset properly | Restores function |
| Verification | Did the repair solve the problem? | Review post-repair trends and performance | Confirms success |
| Prevention | How do we stop recurrence? | Update PM/PdM plan, spares, training, procedures | Improves long-term reliability |
Practical Troubleshooting Workflow for Boiler Operators
A practical boiler troubleshooting workflow should be simple enough for real plant conditions but disciplined enough to avoid dangerous shortcuts. Start by checking the active alarm and the boiler status. Confirm whether the boiler is firing, locked out, in standby, or shut down. Verify water level, steam pressure, fuel supply status, flame condition, and feedwater availability. Review the most recent trend data before and after the event. Identify whether the issue began with water, fuel, air, pressure, electrical controls, or process demand. Check whether recent maintenance, fuel change, water-treatment change, production change, or weather condition may have contributed.
Next, separate symptoms from causes. A burner lockout is a symptom. The cause may be flame scanner fouling, fuel pressure fluctuation, ignition failure, air proving failure, or control interlock. Low pressure is a symptom. The cause may be insufficient firing, sudden demand, steam leak, control valve fault, or boiler capacity limitation. High stack temperature is a symptom. The cause may be soot, scale, excess air, economizer fouling, or feedwater temperature change. This distinction prevents unnecessary part replacement.
Finally, prioritize repair based on safety, production impact, and failure consequence. Safety-related faults must be handled first. Feedwater and combustion problems usually require high priority. Efficiency losses may be scheduled if the boiler is safe, but they should not be ignored because they become long-term cost problems. Minor faults on redundant equipment may be planned, while similar faults on critical single-point assets may require immediate attention.
Final Summary
The most common industrial boiler problems include low water level, high pressure, burner ignition failure, flame instability, feedwater pump problems, poor water treatment, scaling, corrosion, high stack temperature, excessive blowdown, steam leaks, failed traps, condensate return loss, pressure instability, valve sticking, sensor drift, and control-system faults. The correct troubleshooting priority is safety first, then water level and feedwater reliability, pressure control, combustion stability, water chemistry, heat-transfer performance, steam distribution, instrumentation accuracy, and repeat-failure prevention.
Effective troubleshooting is not random repair. It is a structured process that uses operating evidence, mechanical inspection, water chemistry review, combustion analysis, control validation, and maintenance history to identify the real cause. The best boiler teams do not only ask, “How do we restart the boiler?” They ask, “Why did the problem happen, how do we verify the repair, and what must change so it does not happen again?” This approach improves safety, reduces downtime, lowers fuel waste, protects boiler life, and creates a more reliable steam system.
How Can You Troubleshoot Low Steam Pressure in an Industrial Boiler?
Low steam pressure in an industrial boiler is not just an inconvenience; it can interrupt production, reduce process temperature, damage product quality, overload boiler equipment, and hide more serious problems such as burner malfunction, poor combustion, feedwater instability, steam leakage, scaling, or control failure. Many plants react by increasing the firing rate or adjusting pressure controls too quickly, but that can waste fuel, mask the real cause, or even create unsafe operating conditions. The correct solution is to troubleshoot low steam pressure step by step: verify the pressure reading, confirm boiler safety, check steam demand, inspect combustion, review feedwater and water level, examine heat transfer, inspect steam distribution, and correct the root cause instead of only chasing the symptom.
Low steam pressure in an industrial boiler can be troubleshot by first confirming the pressure reading and checking for active safety alarms, then reviewing whether steam demand has exceeded boiler capacity, whether the burner is firing correctly, whether fuel and combustion air are stable, whether feedwater temperature and water level are normal, whether heat-transfer surfaces are fouled or scaled, and whether steam is being lost through leaks, failed traps, pressure-reducing valves, or open bypasses. The priority is safety first, then steam demand, combustion, feedwater, heat transfer, controls, and steam distribution.
A low-pressure problem may be simple, such as a faulty gauge or a sudden production load increase, or it may be a sign of deeper system degradation. The most efficient troubleshooting method is to follow a structured diagnostic path instead of replacing parts randomly. The guide below is written from the perspective of an industrial boiler manufacturer and service supplier, focusing on practical decisions that help operators, maintenance teams, and plant managers restore steam pressure safely and prevent repeat failures.
Low steam pressure always means the boiler is too small for the plant.False
Low steam pressure may be caused by excessive demand, but it can also result from burner faults, fuel supply problems, poor combustion, scaling, fouling, steam leaks, failed traps, control issues, poor feedwater temperature, or inaccurate instrumentation.
The first troubleshooting priority for low steam pressure is to confirm safe boiler operation before making adjustments.True
Low steam pressure should be investigated only after verifying water level, pressure readings, burner status, alarms, fuel safety, and operating conditions so operators do not create unsafe conditions while trying to restore steam output.
⚠️ Start With Safety Before Adjusting Anything
Low steam pressure may feel like a production problem, but the first troubleshooting priority is always boiler safety. Before increasing the firing rate, changing pressure setpoints, resetting the burner, opening bypass valves, or modifying controls, operators should confirm that the boiler is safe to operate. Check the water level, burner status, flame condition, fuel supply status, active alarms, low-water protection, high-pressure controls, feedwater availability, and any unusual noises, smells, vibration, or visible steam leakage. If the boiler has tripped, do not repeatedly reset it without identifying why the trip occurred. Repeated resetting can hide serious faults in combustion, fuel supply, flame detection, water level, draft, or safety interlocks.
A safe diagnostic mindset begins with three questions: Is the boiler actually producing steam? Is the steam pressure reading reliable? Is there any condition that requires immediate shutdown or isolation? If the gauge shows low pressure but the digital transmitter shows normal pressure, instrumentation may be the issue. If both show low pressure and the burner is not firing, the problem may be burner permissives, fuel supply, control logic, or safety lockout. If the burner is firing at high rate but pressure continues to fall, the issue may be excessive steam demand, steam leakage, poor heat transfer, low fuel input, poor combustion, or boiler capacity limitation.
Use the small icons below as a quick mental map:
| Icon | Diagnostic Area | Main Question |
|---|---|---|
| ⚠️ | Safety | Is the boiler safe to operate and troubleshoot? |
| 📟 | Instrumentation | Is the pressure reading correct? |
| 🏭 | Steam demand | Has plant demand exceeded boiler output? |
| 🔥 | Burner and combustion | Is the boiler firing correctly? |
| ⛽ | Fuel supply | Is fuel pressure, flow, and quality stable? |
| 💧 | Feedwater | Is water level and feedwater temperature normal? |
| 🧱 | Heat transfer | Are tubes, fireside surfaces, or economizer fouled? |
| 💨 | Steam system | Are leaks, traps, valves, or PRVs wasting steam? |
| 🎛️ | Controls | Are pressure controls and modulation working properly? |
| 🔧 | Maintenance | What root cause must be corrected to prevent recurrence? |
📟 Step 1: Confirm the Low Steam Pressure Reading
The first technical step is to confirm whether the boiler truly has low steam pressure or whether the problem is an inaccurate reading. Compare the main pressure gauge, digital pressure transmitter, control panel reading, local header gauge, and downstream process pressure where available. A faulty pressure transmitter, blocked impulse line, damaged gauge, poor calibration, electrical signal error, or incorrect scaling in the control system can make pressure appear lower than it actually is.
This matters because a false low-pressure signal can cause dangerous or inefficient responses. If the boiler control system believes pressure is low, it may increase firing unnecessarily. If operators believe the boiler is underperforming, they may make incorrect adjustments. If a downstream gauge reads low while the boiler header is normal, the problem may be a pressure-reducing valve, closed isolation valve, blocked strainer, undersized steam line, or process-side restriction rather than boiler generation.
Quick checks:
| Checkpoint | What to Look For | Likely Meaning |
|---|---|---|
| Boiler pressure gauge vs. transmitter | Readings disagree significantly | Gauge or transmitter error |
| Boiler pressure vs. steam header pressure | Boiler normal, header low | Downstream valve, PRV, restriction, or leak |
| Pressure trend history | Sudden impossible drop | Sensor, wiring, or signal fault |
| Pressure impulse line | Blockage, condensate issue, freezing, leakage | Transmitter not sensing correctly |
| Control panel scaling | Wrong engineering range | False pressure indication |
If instrumentation is suspected, validate the pressure reading with approved site procedures and qualified personnel. Do not adjust combustion, pressure setpoints, or safety controls based on one questionable reading.
🏭 Step 2: Check Whether Steam Demand Suddenly Increased
After confirming the pressure is truly low, check the steam demand. Low steam pressure often occurs because the plant is using steam faster than the boiler can generate it. This can happen during batch production startup, sterilization cycles, cleaning operations, drying loads, process heating, multiple steam users opening at the same time, or seasonal production peaks.
A boiler may be correctly designed for average demand but struggle during sudden peak demand. This is especially common when several large steam users start simultaneously. In that case, the boiler pressure may drop even though the burner is firing properly. The troubleshooting question becomes: Is this a boiler fault, or is the plant demand exceeding available steam generation capacity?
| Symptom | Possible Demand-Related Cause | Priority Action |
|---|---|---|
| Pressure drops when several processes start | Peak demand exceeds boiler response | Stagger steam users or improve sequencing |
| Pressure recovers slowly after startup | Boiler capacity or burner ramp rate limitation | Review load profile and burner modulation |
| Pressure stable at low production, low during peak | Boiler may be undersized for peak load | Calculate peak steam demand |
| One process line causes repeated pressure drops | Large valve opening or uncontrolled steam use | Inspect process control valve and startup procedure |
| Pressure drops after new equipment installation | Added steam load not included in original design | Recalculate boiler capacity requirement |
If the boiler is firing at high load and all combustion conditions are normal, but pressure still falls during peak production, the solution may not be burner repair. It may require load scheduling, steam accumulator review, boiler sequencing improvement, additional boiler capacity, improved condensate return, or process-side control changes.
🔥 Step 3: Verify Burner Firing Rate and Combustion Performance
If steam demand is normal but pressure remains low, inspect the burner and combustion system. The boiler may not be releasing enough heat into the furnace because the burner is not reaching the required firing rate, the air-fuel ratio is incorrect, the flame is unstable, or the fuel supply is limited.
Begin by checking whether the burner is firing at low fire, mid fire, or high fire when pressure is low. If the boiler pressure is below setpoint but the burner remains at low fire, the issue may be pressure-control logic, modulation signal failure, actuator problem, low-fire hold, interlock, or incorrect setpoint configuration. If the burner is commanded to high fire but cannot deliver heat, check fuel pressure, fuel valve position, fan operation, damper position, combustion air, flame quality, and burner mechanical condition.
| Burner Condition | What It Suggests | Troubleshooting Priority |
|---|---|---|
| Burner not firing | Lockout, permissive failure, control issue | Check alarms, interlocks, fuel supply, flame safeguard |
| Burner stuck at low fire | Modulation control or actuator issue | Check pressure controller output and actuator movement |
| Burner commanded high, but weak flame | Fuel pressure, fuel valve, nozzle, or combustion issue | Inspect fuel train and burner setup |
| High oxygen with low steam output | Excess air or poor burner adjustment | Tune burner and inspect air damper |
| Soot or smoke present | Insufficient air, poor atomization, dirty burner | Stop unsafe operation and inspect combustion system |
| Repeated flame failure | Scanner, fuel instability, ignition, draft problem | Diagnose burner sequence before reset |
A combustion test should be performed by qualified personnel when burner performance is suspected. Avoid random fuel-air adjustments. Low steam pressure can tempt operators to “add more fuel,” but fuel must always be matched with correct combustion air and verified flame stability.
⛽ Step 4: Inspect Fuel Supply Stability
Fuel supply problems are a common cause of low steam pressure because the burner may be unable to generate enough heat even when the control system demands higher firing. For gas-fired boilers, check gas pressure, gas regulator performance, gas valve operation, filter or strainer blockage, fuel header pressure during high fire, and whether other equipment is drawing from the same gas supply. For oil-fired boilers, check oil temperature, viscosity, pump pressure, atomizing medium, oil filters, strainers, nozzle condition, and fuel quality. For biomass, coal, or solid-fuel systems, check fuel feed rate, moisture content, ash buildup, grate or feeder operation, and combustion air distribution.
Fuel problems often appear only under load. A gas pressure reading may look normal at low fire but collapse at high fire. An oil filter may allow enough flow during startup but restrict flow during high demand. A biomass feeder may operate but fail to deliver consistent fuel because of bridging, moisture variation, or mechanical wear.
| Fuel Type | Low-Pressure Cause | Diagnostic Sign |
|---|---|---|
| Natural gas | Low supply pressure or regulator restriction | Pressure drops when burner ramps up |
| Diesel/heavy oil | Filter blockage, poor atomization, wrong temperature | Weak flame, smoke, poor firing response |
| Biomass | Wet fuel, poor feed consistency, ash buildup | Slow pressure recovery, unstable furnace temperature |
| Coal | Poor fuel quality, feeder issue, air distribution fault | Incomplete combustion, low heat release |
| LPG | Vaporization or regulator limitation | Pressure instability during high demand |
A stable fuel supply is essential for stable steam pressure. If fuel pressure or fuel flow drops during high load, the boiler cannot maintain pressure no matter how the pressure controller is tuned.
💧 Step 5: Review Feedwater Temperature, Water Level, and Feedwater Control
Feedwater conditions strongly affect steam pressure. If feedwater temperature is lower than normal, the boiler must use more energy to raise the water to boiling temperature, reducing effective steam output. If feedwater flow is unstable, the boiler water level may fluctuate, causing control instability or safety trips. If the feedwater control valve sticks, the boiler may experience level swings that disturb firing and steam generation.
Check feedwater temperature, deaerator operation, condensate return rate, feedwater pump discharge pressure, feedwater valve movement, drum or shell water level, and makeup water percentage. A sudden loss of condensate return can lower feedwater temperature and increase boiler load. A failing feedwater pump can reduce water supply and trigger low-water protection. A control valve that sticks may cause unstable level and firing interruption.
| Feedwater Symptom | Possible Cause | Effect on Steam Pressure |
|---|---|---|
| Feedwater temperature lower than normal | Lost condensate return, deaerator issue, cold makeup water | More heat required, slower pressure recovery |
| Water level unstable | Pump issue, valve sticking, load swings, control tuning | May reduce firing stability or cause trips |
| Feedwater pump vibration | Bearing wear, cavitation, suction restriction | Risk of feedwater failure |
| Low pump discharge pressure | Pump wear, blocked strainer, low suction level | Poor water supply and pressure instability |
| Excess makeup water | Steam leaks, trap failure, condensate loss | Higher fuel demand and lower efficiency |
Do not treat feedwater as only a water-supply issue. Feedwater temperature and stability directly affect boiler output, efficiency, and pressure recovery.
🧱 Step 6: Check Heat-Transfer Surfaces for Soot, Scale, or Fouling
If the burner is firing correctly and steam demand is not excessive, low steam pressure may result from poor heat transfer. The boiler may be burning fuel, but not enough heat is reaching the water. This often happens when fireside surfaces are covered with soot or ash, waterside surfaces are coated with scale, or the economizer is fouled or bypassed.
A key indicator is rising stack temperature. If stack temperature is higher than normal at the same firing rate, heat may be leaving through the chimney instead of transferring into the boiler water. Fireside soot can come from poor combustion, dirty burners, incorrect air-fuel ratio, poor atomization, fuel quality problems, or inadequate cleaning. Waterside scale can come from poor water treatment, hardness leakage, insufficient blowdown, chemical dosing errors, or condensate contamination.
| Heat-Transfer Problem | Diagnostic Clue | Corrective Action |
|---|---|---|
| Fireside soot | High stack temperature, smoke, poor combustion history | Inspect and clean fireside surfaces; tune burner |
| Waterside scale | High stack temperature, poor steam output, water chemistry issues | Inspect water side; clean and correct treatment program |
| Economizer fouling | Reduced feedwater temperature rise | Clean economizer and inspect flow/bypass |
| Excessive blowdown | Fuel waste and lower efficiency | Verify conductivity and blowdown settings |
| Poor insulation | Heat loss to boiler room | Repair insulation and casing leaks |
Heat-transfer problems often develop gradually, so operators may not notice until pressure recovery becomes poor. Compare current stack temperature and steam output with historical baseline data.
💨 Step 7: Inspect Steam Leaks, Failed Steam Traps, and Distribution Losses
Sometimes the boiler is producing enough steam, but the steam is being wasted or lost before reaching the process. Steam leaks, failed steam traps, open bypass valves, leaking safety valves, poorly controlled pressure-reducing stations, or damaged insulation can all reduce available pressure.
Walk the steam distribution system safely and listen for leaks, check visible plumes, inspect condensate return conditions, review steam trap performance, and verify that bypasses and drains are not left open. A failed-open steam trap can waste live steam continuously. Multiple failed traps can create a large hidden steam load. A leaking safety valve or vent can also reduce system pressure. A pressure-reducing valve stuck open or incorrectly set may cause downstream pressure problems even when boiler pressure is adequate.
| Steam System Issue | Symptom | Troubleshooting Action |
|---|---|---|
| Steam leak | Hissing, visible plume, makeup water increase | Locate and repair leak |
| Trap failed open | Hot discharge line, high condensate temperature, steam loss | Test and replace trap |
| Trap failed closed | Poor heating, water hammer, cold equipment | Replace trap and clear blockage |
| PRV problem | Downstream pressure too low or unstable | Inspect PRV, pilot line, strainer, and setpoint |
| Open bypass or drain | Continuous steam loss | Verify valve positions |
| Poor insulation | High surface heat loss | Repair insulation |
A useful clue is makeup water. If makeup water use rises while production is unchanged, the plant may be losing steam or condensate.
🎛️ Step 8: Check Pressure Controls, Modulation, and Boiler Sequencing
Low steam pressure can be caused by poor control response even when the boiler is mechanically capable. Check the pressure controller setpoint, differential, transmitter calibration, burner modulation output, actuator movement, control valve response, and lead-lag sequencing in multi-boiler plants.
If the burner does not increase firing when pressure drops, the controller may not be sending the correct signal. If the controller sends a signal but the actuator does not move, the problem may be actuator failure, linkage wear, damper sticking, or wiring. If pressure swings above and below setpoint, the control loop may be poorly tuned or steam demand may be changing too quickly. If multiple boilers are installed, poor sequencing may cause one boiler to carry too much load while another remains idle or cycles inefficiently.
| Control Problem | Symptom | Likely Fix |
|---|---|---|
| Incorrect pressure setpoint | Boiler maintains wrong pressure | Review approved operating setpoint |
| Pressure transmitter drift | Poor control response | Calibrate transmitter |
| Burner actuator failure | Firing rate does not follow demand | Inspect actuator and linkage |
| Poor PID tuning | Pressure hunting | Tune control loop |
| Bad lead-lag sequencing | One boiler overloaded, another idle | Adjust sequencing strategy |
| Slow valve response | Delayed pressure recovery | Inspect valve, positioner, actuator |
Controls should be adjusted only by qualified personnel. Pressure setpoints, burner modulation, and safety-related controls should never be changed casually to “force” pressure recovery.
🧭 Low Steam Pressure Troubleshooting Priority Chart
| Priority | Diagnostic Area | Main Question | Urgency |
|---|---|---|---|
| 1 | ⚠️ Safety | Is water level, flame, fuel, and pressure protection normal? | Critical |
| 2 | 📟 Pressure verification | Is the pressure reading accurate? | Critical |
| 3 | 🏭 Steam demand | Has demand exceeded boiler capacity? | High |
| 4 | 🔥 Burner operation | Is the burner firing correctly and modulating? | High |
| 5 | ⛽ Fuel supply | Is fuel pressure, flow, and quality stable? | High |
| 6 | 💧 Feedwater | Is feedwater temperature and level control normal? | High |
| 7 | 🧱 Heat transfer | Are soot, scale, or fouling reducing output? | Medium-high |
| 8 | 💨 Steam distribution | Are leaks, traps, or PRVs wasting pressure? | Medium-high |
| 9 | 🎛️ Controls | Are pressure controls and sequencing correct? | Medium-high |
| 10 | 🔧 Prevention | What maintenance change prevents recurrence? | Long-term |
🔧 Practical Troubleshooting Workflow
A clear workflow helps avoid confusion during production pressure loss. Start by confirming the pressure reading and checking active alarms. Verify water level and burner status. If the boiler is locked out, troubleshoot the burner sequence instead of focusing on pressure. If the boiler is firing but pressure is low, determine whether the burner is at high fire. If it is not ramping up, troubleshoot controls and modulation. If it is at high fire, compare steam demand, fuel supply, combustion data, feedwater temperature, and steam losses.
A simple field sequence looks like this:
| Step | Action | Decision Point |
|---|---|---|
| 1 | Confirm pressure with more than one gauge or transmitter | Real low pressure or false reading? |
| 2 | Check water level, alarms, flame, and fuel safety | Safe to continue troubleshooting? |
| 3 | Review steam demand and recent process changes | Demand issue or boiler issue? |
| 4 | Check burner firing rate and modulation | Is boiler responding to pressure drop? |
| 5 | Verify fuel pressure, fuel flow, and combustion air | Is heat input sufficient? |
| 6 | Check feedwater temperature and level stability | Is cold or unstable feedwater reducing output? |
| 7 | Review stack temperature and heat-transfer condition | Is heat being lost through fouling or scale? |
| 8 | Inspect leaks, traps, PRVs, bypasses, and vents | Is steam being wasted downstream? |
| 9 | Validate pressure controls and sequencing | Is control logic limiting recovery? |
| 10 | Document root cause and corrective action | How will recurrence be prevented? |
🛠️ Common Root Causes and Corrective Actions
| Root Cause | What You May Observe | Corrective Action |
|---|---|---|
| Sudden peak steam demand | Pressure drops during process startup | Stagger loads, add accumulator, review boiler capacity |
| Burner stuck at low fire | Low pressure but no firing increase | Check modulation signal, actuator, linkage, controller |
| Low fuel pressure | Weak flame, slow recovery at high fire | Inspect regulator, filter, valve, fuel supply |
| Poor combustion | High O₂, soot, unstable flame | Tune burner and inspect air/fuel system |
| Cold feedwater | Feedwater temperature below normal | Restore condensate return and deaerator performance |
| Scaling or soot | High stack temperature, poor steam output | Clean boiler and correct water/combustion cause |
| Steam leaks | Makeup water increase, visible leakage | Repair leaks and damaged fittings |
| Failed steam traps | High condensate temperature or water hammer | Test and replace traps |
| PRV malfunction | Boiler pressure normal, process pressure low | Inspect PRV, strainer, pilot, downstream valves |
| Sensor drift | Conflicting readings | Calibrate pressure transmitter and gauges |
| Poor sequencing | Multiple boilers cycling or overloaded | Adjust lead-lag control strategy |
| Undersized boiler | Persistent low pressure at peak load despite normal operation | Recalculate steam demand and consider capacity upgrade |
📊 Example Diagnostic Scenarios
| Scenario | Most Likely Problem Area | Reasoning | Recommended Priority |
|---|---|---|---|
| Boiler pressure low, burner not firing | Burner lockout or permissive issue | Steam generation has stopped | Check burner management alarms immediately |
| Pressure low, burner at low fire | Control or modulation issue | Boiler is not responding to demand | Inspect pressure controller and actuator |
| Pressure low, burner at high fire, stack temperature high | Heat-transfer loss or excess air | Fuel is being burned but useful steam output is poor | Check combustion, soot, scale, economizer |
| Pressure low only during production startup | Demand spike | Boiler may not match sudden load | Review process scheduling and peak demand |
| Boiler pressure normal, process pressure low | Distribution or PRV issue | Steam is generated but not reaching process | Inspect PRV, valves, strainers, piping |
| Pressure low with rising makeup water | Steam or condensate loss | Lost steam increases boiler load | Inspect leaks, traps, condensate return |
| Pressure unstable with frequent cycling | Control tuning or load instability | Boiler cannot maintain steady response | Review PID, burner modulation, sequencing |
✅ How to Prevent Low Steam Pressure From Returning
After pressure is restored, the job is not finished. The maintenance team should identify why the problem occurred and how to prevent recurrence. A good prevention plan includes regular combustion testing, pressure transmitter calibration, feedwater pump inspection, steam trap surveys, water treatment review, fireside and waterside cleaning, fuel-system maintenance, PRV inspection, condensate return monitoring, and control-loop tuning.
For smarter boiler management, IoT sensors and predictive maintenance can help detect early signs before pressure drops again. Useful monitoring points include steam pressure, steam flow, fuel flow, oxygen, stack temperature, feedwater temperature, feedwater pump vibration, motor current, water level, burner actuator position, flame signal, conductivity, blowdown rate, condensate return temperature, and makeup water volume. AI-based analysis can compare these signals and identify whether pressure recovery is being affected by demand, combustion, feedwater, heat transfer, controls, or steam losses.
Final Summary
Low steam pressure in an industrial boiler should be troubleshot systematically, not by guesswork. Begin with safety: verify water level, burner status, active alarms, fuel conditions, and pressure protection. Then confirm whether the pressure reading is accurate. Next, determine whether steam demand has exceeded boiler output. If demand is normal, inspect burner firing rate, fuel supply, combustion air, feedwater temperature, water level stability, heat-transfer condition, steam leaks, steam traps, PRVs, controls, and boiler sequencing.
The most common causes of low steam pressure include sudden process demand, burner modulation failure, low fuel pressure, poor combustion, cold feedwater, poor condensate return, scaling, soot, economizer fouling, steam leaks, failed steam traps, malfunctioning pressure-reducing valves, inaccurate pressure instruments, poor control tuning, and insufficient boiler capacity. The best troubleshooting approach is to identify the root cause, verify the repair with operating data, and update the maintenance plan so the same pressure problem does not return.
How Can You Troubleshoot Industrial Boiler Burner and Combustion Problems?
Industrial boiler burner and combustion problems can quickly turn a normal production day into repeated lockouts, unstable steam pressure, high fuel consumption, soot formation, unsafe flame conditions, excessive emissions, or emergency downtime. Many plants respond by resetting the burner, adjusting air dampers, or increasing fuel input without understanding the root cause, but this can make the problem worse and create serious safety risk. The correct solution is to troubleshoot burner and combustion problems in a structured way: confirm safety first, identify where the burner sequence fails, verify fuel supply, inspect combustion air, check ignition, validate flame detection, review oxygen and stack temperature, examine controls, and correct the physical cause instead of only clearing the alarm.
Industrial boiler burner and combustion problems can be troubleshot by checking the burner safety sequence, fuel pressure and flow, combustion air supply, ignition system, flame scanner signal, burner linkage or actuator response, oxygen level, stack temperature, draft condition, control settings, and burner cleanliness. The highest priorities are safe shutdown behavior, reliable ignition, stable flame, correct fuel-air ratio, proper modulation, accurate combustion instruments, and prevention of repeat burner lockouts. Troubleshooting should always be performed by qualified personnel because burner systems involve fuel, flame, pressure, electrical controls, and safety interlocks.
A burner problem is rarely “just a burner problem.” It may be caused by gas pressure instability, oil temperature, blocked filters, dirty flame scanners, poor draft, fan vibration, actuator wear, oxygen analyzer drift, wrong air-fuel ratio, poor water-side heat transfer, unstable steam demand, or incorrect control logic. As a professional industrial boiler manufacturer and system supplier, we recommend a practical troubleshooting framework that helps operators and maintenance teams diagnose burner and combustion faults safely, restore reliable steam generation, reduce fuel waste, and prevent repeated failures.
Repeatedly resetting a boiler burner lockout without finding the cause is a safe troubleshooting method.False
Repeated resets can hide serious problems such as fuel instability, ignition failure, unsafe flame detection, combustion air faults, or failed interlocks. Burner lockouts should be investigated according to site procedures and manufacturer instructions.
Stable combustion depends on correct fuel supply, combustion air, ignition, flame detection, draft, burner condition, and control response.True
A boiler burner requires coordinated fuel, air, ignition, flame proving, draft, mechanical condition, and control logic to maintain safe and efficient combustion.
⚠️ Start With Burner Safety Before Any Adjustment
The first rule in troubleshooting industrial boiler burner and combustion problems is simple: do not bypass safety devices, do not force fuel valves open, do not defeat flame safeguards, and do not repeatedly reset the burner without understanding the lockout cause. A burner is a controlled combustion system. It contains fuel, air, ignition energy, flame detection, purge timing, interlocks, pressure switches, shutoff valves, actuators, and a burner management system. Any troubleshooting step that ignores the safety sequence can create a dangerous fuel accumulation or unstable flame condition.
Before inspecting details, confirm the boiler’s current state. Is the burner locked out, in standby, purging, igniting, firing at low fire, modulating, or shutting down? Check active alarms, fuel valve status, fan operation, flame signal, fuel pressure, air proving switch, water level, steam pressure, furnace pressure where applicable, and emergency stop status. Many burner problems are sequence-related, so the question is not only “why is the burner not working?” but “at which step of the burner sequence does the failure occur?”
A typical burner sequence includes pre-purge, air proving, ignition trial, pilot flame proving where applicable, main flame establishment, low-fire stabilization, modulation, normal shutdown, and post-purge. If the burner fails before ignition, the cause is often an interlock, air proving issue, fan problem, damper position fault, pressure switch, or control permissive. If it fails during ignition, inspect the igniter, pilot fuel, electrode, transformer, flame scanner, and ignition timing. If it fails after main flame starts, investigate fuel pressure, fuel-air ratio, flame scanner reliability, draft, burner cleanliness, and modulation response.
| Diagnostic Icon | Burner Area | Key Question |
|---|---|---|
| ⚠️ | Safety interlocks | Is the burner allowed to start safely? |
| 🌬️ | Combustion air | Is the fan, damper, and air proving system working? |
| ⛽ | Fuel supply | Is fuel pressure, flow, and quality stable? |
| ⚡ | Ignition | Is the spark, pilot, or ignition source reliable? |
| 👁️ | Flame detection | Is the flame scanner seeing a stable flame? |
| 🔥 | Combustion quality | Is the flame stable, clean, and correctly adjusted? |
| 🎛️ | Controls | Is modulation following steam demand correctly? |
| 🧪 | Flue gas data | Are oxygen, CO where monitored, and stack temperature normal? |
| 🔧 | Maintenance | What must be cleaned, calibrated, repaired, or replaced? |
Step 1: Identify the Exact Burner Symptom
Accurate troubleshooting starts with symptom classification. “The burner has a problem” is too broad. The maintenance team must identify whether the issue is no start, failed purge, failed ignition, pilot failure, main flame failure, flame loss during firing, poor modulation, high oxygen, soot formation, pulsation, high stack temperature, smoke, high fuel use, or repeated nuisance lockout. Each symptom points to a different diagnostic path.
For example, a burner that never starts may have a permissive or interlock issue. A burner that starts the fan but fails before ignition may have an air proving, damper position, or purge sequence problem. A burner that sparks but does not light may have an ignition transformer, electrode, pilot fuel, gas valve, oil atomization, or fuel pressure problem. A burner that lights but quickly loses flame may have poor flame scanner signal, unstable fuel pressure, incorrect air setting, poor draft, or flame shape problems. A burner that operates but produces soot may have insufficient air, poor atomization, dirty burner components, poor fuel quality, or blocked air passages.
| Burner Symptom | Most Likely Problem Area | First Troubleshooting Priority |
|---|---|---|
| Burner does not start | Interlock, permissive, control power, emergency stop | Review safety circuit and active alarms |
| Fan starts but ignition does not begin | Air proving, damper position, purge sequence | Check air switch, fan, damper feedback |
| Spark occurs but no flame | Ignition system, pilot fuel, fuel valve, electrode | Inspect ignition and fuel availability |
| Pilot lights but main flame fails | Main fuel valve, flame scanner, fuel-air transition | Review pilot-to-main sequence |
| Flame fails during operation | Fuel pressure, scanner signal, draft, air-fuel ratio | Trend flame signal and fuel pressure |
| Burner stuck at low fire | Modulation signal, actuator, linkage, pressure control | Compare controller output with actuator position |
| High oxygen | Excess air, damper drift, actuator/linkage issue | Check O₂ versus firing rate and damper position |
| Soot or smoke | Insufficient air, poor atomization, dirty burner | Stop unsafe operation and inspect combustion |
| Pulsation or rumbling | Combustion instability, draft issue, poor setup | Inspect draft, burner settings, fuel-air stability |
| High stack temperature | Fouling, excess air, scale, heat-transfer loss | Compare stack temperature, O₂, and load |
Step 2: Review Burner Lockout History and Event Sequence
A burner lockout is the burner management system protecting the boiler from unsafe operation. The lockout message matters, but the event sequence matters even more. A control panel may show “flame failure,” but the true cause may have occurred seconds earlier: gas pressure dropped, air proving switch opened, flame scanner signal weakened, damper feedback failed, or ignition did not establish properly.
Review alarm history, time-stamped trends, flame signal strength, fuel pressure, fan status, damper position, oxygen level, firing rate, steam pressure, and interlock status before the trip. If the same alarm repeats, look for a repeating pattern. Does it happen only during startup? Only at low fire? Only at high fire? Only during rapid load change? Only after maintenance? Only in cold weather? Only when another gas-consuming process starts? These details narrow the cause.
A practical lockout review should answer five questions: where did the sequence stop, what permissive changed first, what operating condition was abnormal before the lockout, whether the fault is repeatable, and what field inspection confirms the diagnosis. Without this sequence-based approach, teams often replace flame scanners, switches, or controllers without solving the underlying fuel, air, or draft problem.
Step 3: Verify Fuel Supply and Fuel Train Performance
Fuel supply problems are among the most common causes of burner and combustion faults. A burner cannot maintain stable combustion if fuel pressure, fuel flow, fuel quality, temperature, viscosity, or valve operation is unstable. For gas-fired boilers, check gas supply pressure, regulator performance, gas valve operation, low-gas and high-gas pressure switches, filters, strainers, vent lines where applicable, and whether pressure drops when the burner moves to high fire. For oil-fired boilers, check oil pump pressure, fuel temperature, viscosity, filters, strainers, atomizing air or steam, oil nozzle condition, and fuel recirculation. For biomass, coal, or other solid fuels, check feed rate, moisture, fuel size, ash buildup, grate condition, and combustion air distribution.
A common mistake is checking fuel pressure only at standby or low fire. Fuel problems often appear under load. Gas pressure may look acceptable before firing but collapse during high-fire demand. Oil may flow at low load but fail to atomize correctly at high load due to temperature, viscosity, or filter restriction. Biomass fuel may feed normally for a short period but become inconsistent because of moisture, bridging, or feeder wear.
| Fuel Type | Common Burner Problem | Diagnostic Clue | Corrective Action |
|---|---|---|---|
| Natural gas | Pressure drop at high fire | Flame weakens when burner ramps up | Inspect regulator, gas filter, supply capacity, valve train |
| LPG | Vaporization or regulator limitation | Pressure unstable during high demand | Review vaporizer and regulator sizing |
| Diesel/light oil | Filter blockage or pump issue | Poor flame, low oil pressure | Replace filters, inspect pump and nozzle |
| Heavy oil | Wrong temperature or viscosity | Smoke, poor atomization, unstable flame | Verify heating, viscosity, atomizing medium |
| Biomass | Moisture or feed inconsistency | Slow load response, unstable furnace heat | Improve fuel handling and feed control |
| Coal | Poor fuel quality or air distribution | Incomplete combustion, slagging, smoke | Inspect fuel feed, grate, air distribution |
Fuel train troubleshooting must follow approved safety procedures. Fuel valves, pressure switches, regulators, and shutoff devices are part of the burner safety system and should be serviced by qualified technicians.
Step 4: Inspect Combustion Air, Fan, Damper, and Draft
Combustion requires the correct amount of air delivered at the correct time and distributed properly through the burner. Too much air wastes energy and can destabilize flame shape. Too little air can cause incomplete combustion, soot, smoke, carbon monoxide where applicable, and unsafe conditions. Combustion air problems may come from fan failure, damper sticking, actuator wear, broken linkage, blocked air inlet, dirty air filters, incorrect fan rotation, variable-frequency drive fault, air proving switch failure, or poor draft.
Begin by checking whether the combustion air fan starts and reaches proper speed. Confirm air proving switch operation, damper position, actuator response, linkage condition, and air inlet cleanliness. Compare commanded damper position with actual movement. If the control system requests more air but the damper does not move correctly, the burner may trip or burn poorly. If the damper moves but oxygen does not change as expected, there may be air leakage, blocked passages, fan performance problems, or analyzer error.
Draft problems can also affect combustion. Poor draft may cause flame instability, furnace pressure alarms, smoke, rollout risk, or poor flue gas removal. Excessive draft may pull the flame away from the burner or increase excess air. Check stack damper position, induced-draft fan where applicable, flue restrictions, economizer fouling, chimney condition, and furnace pressure readings.
| Air/Draft Issue | Symptom | Troubleshooting Check |
|---|---|---|
| Fan not running | No purge or no ignition permissive | Check motor, starter, VFD, overload, fan rotation |
| Air proving switch fault | Burner fails before ignition | Check switch, tubing, fan pressure, damper position |
| Damper stuck | Poor purge, low air, high oxygen mismatch | Inspect actuator, linkage, blade movement |
| Blocked air inlet | Weak flame, smoke, low oxygen | Inspect filters, louvers, intake screens |
| Excessive air | High oxygen, high stack loss | Tune air-fuel ratio and inspect linkage |
| Poor draft | Flame instability, smoke, furnace pressure issue | Inspect stack, dampers, ID fan, flue restrictions |
| Economizer fouling | High draft loss and high stack temperature | Inspect and clean economizer |
Step 5: Check Ignition System Reliability
Ignition problems usually appear during startup. The burner may purge correctly, attempt ignition, and then lock out because flame is not established within the permitted trial time. Common causes include failed ignition transformer, weak spark, incorrect electrode gap or position, dirty electrodes, damaged ignition cable, poor grounding, pilot fuel problem, blocked pilot line, incorrect pilot air, or moisture contamination.
For gas pilot systems, verify pilot gas pressure, pilot valve operation, pilot regulator condition, pilot nozzle cleanliness, and flame scanner visibility. For direct spark systems, check electrode condition, ceramic insulator cracks, transformer output, cable integrity, and spark location. For oil burners, poor atomization can look like ignition failure because the fuel is present but not prepared correctly for combustion.
Ignition troubleshooting should be based on the burner manufacturer’s instructions. The ignition trial period and flame proving requirements are safety functions. Do not extend trial timing or bypass flame detection to “help” the burner light. That can create unsafe fuel accumulation.
Step 6: Validate Flame Scanner and Flame Signal
The flame detection system proves that flame exists when fuel is admitted. If the scanner does not reliably see the flame, the burner may lock out even if combustion is physically present. Flame scanner problems can be caused by dirt, soot, misalignment, wrong scanner type, weak flame, poor sighting tube condition, wiring faults, grounding problems, vibration, moisture, or control module issues.
Check flame signal strength during pilot, main flame, low fire, high fire, and modulation. A flame signal that is acceptable at high fire but weak at low fire may indicate scanner alignment or flame shape problems. A signal that gradually declines over weeks may suggest scanner lens fouling. A signal that drops suddenly during load changes may indicate flame instability, draft disturbance, or fuel pressure fluctuation.
| Flame Detection Symptom | Likely Cause | Corrective Action |
|---|---|---|
| No flame signal during ignition | Scanner dirty, failed, misaligned, or no flame | Clean, align, test scanner and verify actual flame |
| Weak pilot signal | Poor pilot flame, scanner sight issue | Inspect pilot fuel, electrode, scanner position |
| Signal drops at low fire | Flame shape or scanner angle problem | Adjust according to manufacturer procedure |
| Signal unstable during modulation | Fuel-air instability or draft issue | Trend fuel pressure, air damper, draft, flame signal |
| Frequent false flame failure | Scanner wiring, grounding, vibration, control module | Inspect electrical connections and scanner mounting |
Flame scanner maintenance is often simple but critical. A dirty scanner lens can cause repeated lockouts, but replacing the scanner without cleaning the sight tube or correcting soot formation may not solve the problem.
Step 7: Analyze Combustion Quality With Flue Gas Data
Combustion troubleshooting should include flue gas analysis. Important indicators include oxygen, carbon monoxide where monitored, carbon dioxide, stack temperature, draft, smoke number for oil-fired boilers where applicable, and excess air. These readings must be interpreted together with boiler load, burner firing rate, fuel type, feedwater temperature, and stack condition.
High oxygen usually means excess air, but it may also indicate air leakage, incorrect damper position, linkage drift, actuator error, or oxygen analyzer calibration problem. Low oxygen may indicate insufficient air and can be unsafe. High carbon monoxide where measured can indicate incomplete combustion, poor mixing, insufficient air, burner contamination, or poor flame stability. High stack temperature can indicate excess air, soot, scale, fouling, or heat-transfer degradation.
| Flue Gas Finding | Possible Meaning | Troubleshooting Direction |
|---|---|---|
| High O₂, high stack temperature | Excess air or air leakage | Inspect air damper, linkage, actuator, oxygen analyzer |
| Low O₂, smoke/soot | Insufficient air or poor atomization | Inspect burner, air supply, fuel atomization |
| High CO where monitored | Incomplete combustion | Check air-fuel ratio, burner cleanliness, draft |
| Rising stack temperature at same load | Fouling, soot, scale, economizer issue | Inspect fireside/waterside surfaces |
| O₂ reading unstable | Sensor drift, air fluctuation, modulation issue | Calibrate analyzer and inspect controls |
| Good O₂ but poor steam output | Heat-transfer or steam demand problem | Check scale, soot, leaks, feedwater temperature |
Combustion data should be collected by qualified personnel using calibrated instruments. Burner tuning is not a guessing exercise. Incorrect adjustment can increase fuel use, create soot, destabilize flame, or produce unsafe combustion.
Step 8: Inspect Burner Mechanical Condition
Mechanical wear can cause combustion problems even when sensors and controls appear normal. Burner components operate in a hot, vibrating environment. Linkages loosen, actuators lose accuracy, dampers stick, fan bearings wear, oil nozzles erode, gas ports become dirty, refractory changes flame shape, and seals leak air. These issues often develop slowly and create gradual combustion drift.
Inspect the burner head, diffuser, register, gas spuds, oil gun, atomizer, nozzles, electrodes, flame scanner sight tube, burner throat, fan wheel, damper blades, linkages, actuator arms, bearings, gaskets, and refractory. Look for soot, cracks, looseness, corrosion, oil residue, blocked passages, rubbing marks, or signs of overheating.
Mechanical inspection should also include modulation hardware. If the boiler uses mechanical linkage between fuel and air, worn linkage can create incorrect fuel-air ratio at certain firing rates. If it uses parallel positioning, verify that actuators respond correctly and feedback is accurate. If it uses oxygen trim, confirm the oxygen analyzer is calibrated and trim limits are configured correctly.
Step 9: Troubleshoot Burner Modulation and Pressure Response
A burner may ignite successfully but still fail to support stable boiler operation because modulation is poor. Symptoms include steam pressure hunting, slow pressure recovery, burner stuck at low fire, overshooting pressure, frequent cycling, unstable oxygen, and repeated high-low firing. The cause may be pressure transmitter drift, poor PID tuning, actuator failure, linkage wear, fuel valve problems, damper stiction, or incorrect lead-lag sequencing in multi-boiler plants.
To troubleshoot modulation, compare the steam pressure setpoint, actual pressure, controller output, burner firing rate, fuel valve position, air damper position, and actuator feedback. If pressure is low but controller output does not increase, investigate the pressure controller, transmitter, setpoint, or control logic. If output increases but actuator position does not follow, inspect actuator, linkage, wiring, and feedback. If actuator moves but combustion readings become abnormal, inspect fuel-air calibration and burner setup.
| Modulation Symptom | Likely Cause | Diagnostic Method |
|---|---|---|
| Burner stuck at low fire | Control output issue, actuator failure, low-fire hold | Compare pressure error with modulation signal |
| Slow pressure recovery | Fuel limitation, actuator slow response, undersized boiler | Review firing rate, fuel pressure, load demand |
| Pressure hunting | Poor PID tuning, oversized boiler, valve stiction | Trend pressure, firing rate, demand changes |
| O₂ unstable during modulation | Air-fuel curve issue, linkage wear, analyzer delay | Test at multiple firing rates |
| Frequent cycling | Low load, poor turndown, sequencing problem | Review load profile and burner on/off frequency |
Step 10: Check Whether the Problem Is Actually Heat Transfer, Not Combustion
Some boiler problems look like burner problems but are actually heat-transfer problems. For example, operators may report that the burner is firing but steam pressure recovers slowly. The burner may be working correctly, but soot, ash, scale, or economizer fouling may be preventing heat transfer into the water. In this case, adjusting fuel and air will not solve the root cause.
Compare stack temperature with historical values at similar firing rates. If stack temperature is higher than normal, heat may be escaping through the flue. Fireside fouling often comes from poor combustion, fuel quality, oil atomization problems, or inadequate cleaning. Waterside scale often comes from poor water treatment, hardness leakage, chemical dosing errors, insufficient blowdown, or condensate contamination. Economizer fouling can reduce feedwater heat recovery and increase fuel use.
A good troubleshooting rule is this: if combustion readings are acceptable but steam output is poor and stack temperature is rising, inspect heat-transfer surfaces before making major burner adjustments.
Step 11: Use IoT, AI, and Predictive Maintenance for Early Detection
Modern burner troubleshooting becomes much more effective when real-time data is available. IoT sensors can monitor fuel pressure, fuel flow, oxygen, stack temperature, burner firing rate, fan speed, damper position, actuator feedback, flame signal, steam pressure, furnace pressure, motor current, vibration, and alarm history. AI can compare these signals and detect early signs of burner drift, ignition delay, weak flame signal, excess air, fuel pressure instability, fan degradation, actuator wear, or heat-transfer loss. Predictive maintenance can then schedule cleaning, calibration, tuning, repair, or replacement before repeated lockouts occur.
For example, a declining flame signal over several weeks may indicate scanner fouling. Rising oxygen at the same firing rate may indicate damper drift or actuator wear. Fuel pressure drops during high fire may indicate regulator or supply limitation. Rising stack temperature at stable oxygen may indicate fouling or scale. Increasing fan vibration may indicate bearing wear or imbalance. These early warnings allow maintenance teams to act during planned downtime rather than responding to emergency burner failure.
Burner and Combustion Troubleshooting Priority Matrix
| Priority | Problem Area | Risk Level | Typical Action |
|---|---|---|---|
| 1 | Fuel leakage, unsafe flame, repeated unexplained lockout | Critical | Stop and follow safety procedures |
| 2 | Low-water, high-pressure, or safety interlock alarms | Critical | Verify boiler safety before burner work |
| 3 | Failed ignition or flame failure | High | Diagnose sequence, ignition, fuel, scanner |
| 4 | Fuel pressure instability | High | Inspect regulator, valves, filters, supply |
| 5 | Combustion air or draft fault | High | Inspect fan, damper, air proving, stack |
| 6 | Soot, smoke, high CO where monitored | High | Stop unsafe combustion and inspect burner |
| 7 | High oxygen or high stack loss | Medium-high | Tune burner and inspect actuator/linkage |
| 8 | Poor modulation or pressure hunting | Medium-high | Check controls, actuator, PID, load profile |
| 9 | Heat-transfer fouling mistaken as burner issue | Medium | Inspect fireside, waterside, economizer |
| 10 | Repeat failures | Long-term high | Apply predictive maintenance and root-cause correction |
Common Mistakes to Avoid
One major mistake is treating every burner lockout as a simple reset problem. A lockout is a safety event and should be investigated. Another mistake is adjusting air-fuel settings without calibrated combustion instruments. Visual flame appearance alone is not enough for proper tuning. A third mistake is replacing the flame scanner without checking scanner sighting, flame quality, wiring, grounding, and soot formation. A fourth mistake is blaming the burner for poor steam pressure when the real cause is scaling, fouling, steam leakage, or excessive demand. A fifth mistake is ignoring fuel supply behavior under high fire. Fuel pressure may look normal at startup but fail during peak load.
Another common mistake is forgetting that combustion problems can damage the boiler over time. Poor combustion can create soot, high stack temperature, unstable flame, thermal stress, and efficiency loss. Water-side scale can make a burner appear weak because heat transfer is poor. Excess air can waste fuel continuously. Low air can create soot and unsafe combustion. The best troubleshooting teams do not only restart the burner; they identify why combustion became unstable and correct the root cause.
Final Summary
Industrial boiler burner and combustion problems should be troubleshot through a structured safety-first process. Start by identifying the exact symptom and where the burner sequence fails. Review lockout history, interlocks, fuel supply, combustion air, ignition, flame detection, flue gas data, burner mechanical condition, modulation response, draft, and heat-transfer condition. Do not bypass safety devices or repeatedly reset lockouts without diagnosis. Burner systems involve fuel and flame, so troubleshooting must be performed by trained and qualified personnel.
The most common causes of burner and combustion problems include low or unstable fuel pressure, blocked filters, incorrect oil temperature, poor atomization, dirty burner components, failed ignition parts, weak flame scanner signal, poor scanner alignment, air damper sticking, fan problems, draft issues, actuator wear, linkage drift, oxygen analyzer error, poor control tuning, soot, scale, and economizer fouling. The correct troubleshooting priority is safety, sequence diagnosis, fuel, air, ignition, flame detection, combustion quality, controls, heat transfer, and repeat-failure prevention.
How Can You Troubleshoot Industrial Boiler Water Level, Feedwater, and Pump Problems?

Industrial boiler water level, feedwater, and pump problems are among the most serious issues in boiler operation because they directly affect safety, steam stability, pressure-vessel protection, energy efficiency, and production continuity. A small feedwater flow fluctuation, pump vibration, blocked strainer, faulty level transmitter, sticking control valve, deaerator problem, or unstable condensate return can quickly lead to low-water alarms, boiler trips, pressure instability, tube overheating risk, cavitation damage, emergency downtime, and expensive repairs. The practical solution is not to guess or repeatedly reset alarms; it is to troubleshoot in a structured safety-first sequence: verify the actual water level, confirm feedwater supply, inspect pump performance, check control valve response, review deaerator and condensate conditions, validate instruments, and correct the root cause before the boiler returns to normal operation.
Industrial boiler water level, feedwater, and pump problems can be troubleshot by first confirming safe boiler water level through approved indicators, then checking feedwater pump suction conditions, discharge pressure, motor current, vibration, strainer condition, check valves, feedwater control valve movement, deaerator level, condensate return, makeup water supply, level transmitter accuracy, and control logic. The highest troubleshooting priorities are low-water protection, stable feedwater flow, reliable pump operation, accurate level measurement, proper deaeration, and prevention of cavitation, scaling, corrosion, and repeat boiler trips.
Water level and feedwater troubleshooting should always be treated as a high-priority boiler safety task, not just a maintenance inconvenience. As a professional industrial boiler manufacturer and system supplier, we recommend using a disciplined diagnostic method that separates symptoms from causes. A low-water alarm may be caused by a real lack of water, but it may also be caused by level transmitter drift, blocked gauge connections, pump cavitation, a stuck valve, unstable steam load, poor control tuning, or condensate return interruption. The guide below explains how to troubleshoot these problems practically and safely, while also helping your plant reduce downtime, protect boiler life, and improve feedwater system reliability.
Low water level in an industrial boiler can create serious safety risk because heating surfaces may become overheated if they are not properly covered by water.True
Boiler heating surfaces must remain adequately covered by water during operation. Low water can expose surfaces to excessive heat, causing overheating, tube damage, shutdown, or severe equipment risk.
A feedwater pump that is running always means the boiler is receiving enough feedwater.False
A feedwater pump may run while still delivering insufficient water because of cavitation, blocked suction strainers, low suction pressure, worn impellers, closed valves, check valve failure, air binding, incorrect rotation, or control valve problems.
⚠️ Start With Water Level Safety Before Troubleshooting the Pump
The first troubleshooting priority is to determine whether the boiler has a safe water level. Before focusing on the feedwater pump, motor, valve, or controller, operators must confirm whether the boiler water level is actually normal, low, high, or uncertain. This is critical because water level is one of the most important safety conditions in any steam boiler. If the actual water level is dangerously low, continued firing can expose heat-transfer surfaces and create overheating risk. If the water level is excessively high, water may carry over into the steam system, damaging downstream equipment, reducing steam quality, and causing water hammer. If the water level cannot be verified because instruments disagree, the situation must be treated seriously until the actual condition is confirmed by approved site procedures.
A common mistake is assuming that every low-water alarm is caused by a failed sensor. That assumption is dangerous. A low-water alarm may indeed be caused by transmitter failure or blocked gauge connections, but it may also indicate real feedwater loss, pump failure, valve blockage, deaerator level problem, or sudden steam demand. Another common mistake is assuming that because the feedwater pump is running, the boiler must be receiving enough water. In reality, a pump can rotate while delivering very little useful flow due to cavitation, air binding, incorrect rotation, closed suction valve, blocked strainer, worn impeller, damaged coupling, or inadequate suction head.
Use a safety-first diagnostic map:
| Icon | Diagnostic Area | Main Question |
|---|---|---|
| ⚠️ | Boiler safety | Is the boiler water level safe and verified? |
| 👁️ | Level indication | Do gauge glass, transmitter, and control panel agree? |
| 💧 | Feedwater supply | Is enough water available at the pump suction? |
| ⚙️ | Feedwater pump | Is the pump actually producing flow and pressure? |
| 🔄 | Control valve | Is the feedwater valve responding correctly? |
| 🫧 | Cavitation | Is the pump starved, vaporizing, or noisy? |
| 🏭 | Deaerator/condensate | Is feedwater tank level and temperature stable? |
| 📟 | Instrumentation | Are level, pressure, and flow instruments accurate? |
| 🔧 | Maintenance | What physical defect must be corrected? |
| 📋 | Prevention | What change prevents recurrence? |
Step 1: Confirm the Actual Boiler Water Level
The first technical step is to compare all available level indicators. Check the gauge glass, remote level transmitter, control panel display, low-water cutoff status, high-water alarm, feedwater controller reading, and any redundant level devices installed on the boiler. The goal is to determine whether the level is truly abnormal or whether the indication is unreliable. If the gauge glass shows normal level but the transmitter reads low, the transmitter or impulse line may be faulty. If the transmitter shows normal but the gauge glass appears empty, operators must not dismiss the gauge glass without following approved verification procedures. If all indicators show low level, the feedwater system requires urgent attention.
Level indication problems may come from blocked gauge glass connections, sludge accumulation, closed isolation valves, faulty level electrodes, transmitter calibration drift, impulse line blockage, wiring faults, unstable drum conditions, foaming, or control system scaling errors. In high-pressure or high-duty boilers, water level can also appear unstable due to rapid steam demand changes, shrink and swell effects, poor drum internals, or control-loop tuning problems. Operators should understand that water level is not always a perfectly calm measurement. However, persistent level instability is still a problem that must be investigated.
| Level Indication Condition | Possible Meaning | Troubleshooting Action |
|---|---|---|
| Gauge glass and transmitter both low | Real low-water condition likely | Verify feedwater supply and follow safety procedures immediately |
| Gauge glass normal, transmitter low | Transmitter, impulse line, or signal issue | Inspect calibration, wiring, isolation valves, impulse lines |
| Gauge glass low, transmitter normal | Gauge connection blockage or transmitter error possible | Treat as serious until actual level is verified |
| Level fluctuates rapidly | Load swings, foaming, control instability, transmitter noise | Review steam demand, water chemistry, and control tuning |
| High-water alarm | Overfeeding, valve leakage, controller fault, poor tuning | Check feedwater valve, pump control, and level controller |
| Level reading flatlines | Sensor failure, blocked line, wiring fault | Validate instrument and inspect connections |
If water level is uncertain, the safest response is to stop making assumptions and follow the plant’s boiler safety procedure. Level verification must be performed only by trained personnel, especially on high-pressure systems.
Step 2: Check Whether the Feedwater Pump Is Actually Delivering Water
Once the actual water level condition is understood, inspect the feedwater pump system. A running pump is not enough; it must deliver the correct flow and discharge pressure to overcome boiler pressure, piping losses, control valve pressure drop, and check valve resistance. Begin by checking pump suction valve position, discharge valve position, pump rotation, motor status, discharge pressure, suction pressure, flow rate if available, motor current, vibration, noise, seal leakage, bearing temperature, and whether the pump is operating on the correct control signal.
A pump that produces normal discharge pressure but low flow may be restricted downstream by a closed valve, stuck check valve, blocked control valve, or incorrect control signal. A pump that produces low discharge pressure may have suction starvation, cavitation, worn impeller, wrong rotation, air binding, internal wear, coupling damage, or insufficient speed. A pump with high motor current may be overloaded, misaligned, mechanically damaged, or operating against abnormal hydraulic conditions. A pump with low motor current may not be moving enough water, may be air bound, or may have a damaged impeller.
| Pump Observation | Likely Cause | Priority Check |
|---|---|---|
| Pump running, discharge pressure low | Cavitation, worn impeller, air binding, wrong rotation | Check suction pressure, strainer, rotation, impeller condition |
| Pump running, pressure normal, boiler level not rising | Downstream blockage, control valve closed, check valve stuck | Inspect discharge path and feedwater valve |
| Pump noisy with vibration | Cavitation, bearing wear, misalignment, imbalance | Check NPSH conditions and mechanical alignment |
| Motor current high | Mechanical drag, overload, blocked discharge, bearing fault | Check current, bearings, pump curve, discharge valve |
| Motor current low | No flow, air binding, coupling problem, impeller damage | Check flow, coupling, suction condition |
| Seal leakage | Seal wear, misalignment, pressure issue | Inspect seal, shaft, bearings, suction/discharge pressure |
| Pump trips | Electrical overload, motor fault, cavitation, seized bearing | Review trip code and mechanical condition |
Pump troubleshooting should always consider the full hydraulic path. Water must travel from the feedwater tank or deaerator through suction piping, strainers, valves, pump casing, impeller, discharge piping, check valves, control valves, and into the boiler. A restriction at any point can create a low-water or unstable-feedwater problem.
Step 3: Diagnose Pump Cavitation and Suction Problems
Cavitation is one of the most common and destructive feedwater pump problems. It occurs when local pressure at the pump suction or impeller eye falls low enough for vapor bubbles to form and collapse. Feedwater pumps are especially vulnerable because feedwater may be hot, and hot water is closer to vaporization. Cavitation can sound like gravel, crackling, or rattling inside the pump. It can cause vibration, impeller pitting, seal failure, bearing damage, reduced flow, unstable discharge pressure, and eventual pump failure.
Common causes of cavitation include low deaerator or feedwater tank level, high feedwater temperature without sufficient suction head, blocked suction strainer, partially closed suction valve, undersized suction piping, excessive suction lift, air leakage into suction piping, poor pump selection, excessive pump speed, or operating far from the best efficiency point. Cavitation may become worse during high steam demand because the pump must deliver more flow and suction losses increase.
| Cavitation Cause | Field Symptom | Corrective Action |
|---|---|---|
| Low feedwater tank level | Pump noise, unstable pressure, low flow | Restore tank level and check level control |
| Blocked suction strainer | Suction pressure drops, pump vibrates | Clean strainer and inspect upstream contamination |
| Hot feedwater with poor suction head | Cavitation during high temperature operation | Review NPSH margin and deaerator elevation |
| Partially closed suction valve | Low suction pressure and noisy pump | Verify valve position and remove restrictions |
| Air leak in suction line | Erratic pressure, air binding | Inspect flanges, seals, gaskets, vents |
| Excessive pump speed | High vibration and cavitation | Review VFD settings and pump curve |
| Wrong pump selection | Chronic cavitation at normal operation | Re-evaluate pump sizing and NPSH requirements |
A practical cavitation check includes listening to the pump, checking suction pressure, comparing pump operation with the pump curve, inspecting strainers, checking tank level, reviewing feedwater temperature, and verifying that suction piping has not been modified. If cavitation is confirmed, simply replacing the pump seal or bearing will not solve the root cause. The suction condition must be corrected.
Step 4: Inspect the Feedwater Control Valve and Check Valves
Feedwater control valves are frequent causes of boiler level instability. A control valve may stick, respond slowly, fail to open fully, leak through when closed, or move differently from its command signal. This can create low water, high water, pressure swings, pump cycling, and unstable boiler operation. If the boiler level controller demands more feedwater but the valve does not open, the boiler level may fall. If the valve leaks or opens too much, the boiler may experience high water or carryover risk.
Troubleshooting should compare the controller output, valve position feedback, actual feedwater flow, boiler level response, and pump discharge pressure. If the controller output increases but the valve position does not change, inspect the actuator, positioner, air supply, wiring, linkage, and valve stem. If the valve position changes but flow does not increase, inspect for plugged strainers, downstream blockage, check valve problems, or insufficient pump pressure. If flow continues when the valve should be closed, inspect valve seat leakage or bypass valves.
Check valves can also create serious feedwater problems. A stuck closed check valve prevents feedwater from entering the boiler. A leaking check valve may allow reverse flow, pressure loss, pump damage, or water hammer. A chattering check valve may indicate poor sizing, low flow, unstable pump operation, or pressure pulsation.
| Valve Problem | Symptom | Troubleshooting Action |
|---|---|---|
| Feedwater valve stuck closed | Low level, pump pressure high, no flow | Inspect actuator, positioner, stem, valve body |
| Feedwater valve stuck open | High water level or overfeeding | Inspect valve seat, actuator, control signal |
| Valve slow response | Level hunting | Stroke test valve and check positioner tuning |
| Valve command-position mismatch | Controller output does not match movement | Check actuator air/electric supply and feedback |
| Check valve stuck closed | Pump pressure high, no boiler level recovery | Inspect check valve and downstream piping |
| Check valve leaking backward | Pump cycling, pressure loss, water hammer | Repair or replace check valve |
| Bypass valve open | Overfeeding or uncontrolled flow | Verify all manual valve positions |
Step 5: Review Deaerator, Feedwater Tank, and Condensate Return Conditions
The feedwater pump cannot perform reliably if the feedwater source is unstable. The deaerator or feedwater tank provides water volume, temperature control, and in many systems oxygen removal support. Problems in this area can create low suction pressure, pump cavitation, oxygen corrosion risk, poor feedwater temperature, and unstable boiler level.
Check deaerator level, feedwater tank level, makeup water valve operation, condensate return rate, condensate temperature, steam supply to the deaerator, venting condition, overflow, transfer pumps, and level controls. If the deaerator level is too low, the feedwater pump may starve. If the feedwater temperature is too high for the available suction head, cavitation risk increases. If condensate return suddenly drops, the system may introduce more cold makeup water, reducing boiler efficiency and changing water chemistry. If condensate is contaminated, it may disturb boiler water quality and force blowdown changes.
| Deaerator/Condensate Issue | Boiler Symptom | Corrective Direction |
|---|---|---|
| Low deaerator level | Pump cavitation, low feedwater pressure | Check makeup valve, condensate pumps, level control |
| Unstable deaerator pressure | Feedwater temperature instability | Inspect steam supply and pressure control |
| Low condensate return | Cold feedwater, higher fuel use, makeup increase | Inspect traps, leaks, condensate pumps, return lines |
| Contaminated condensate | Conductivity changes, foaming, corrosion risk | Isolate contamination source and test condensate |
| Overflowing tank | Control valve fault, level transmitter error | Inspect level control and overflow path |
| Poor venting | Oxygen removal problems | Review deaerator operation and vent settings |
| Condensate pump failure | Low return and low tank level | Inspect pump, receiver, controls, check valves |
Feedwater troubleshooting should always include the system upstream of the pump. A pump cannot compensate for a poorly controlled or poorly supplied deaerator.
Step 6: Check Boiler Water Chemistry, Foaming, and Carryover
Water chemistry can create symptoms that look like level-control or feedwater problems. Foaming, priming, and carryover can cause unstable water level indication, wet steam, high-water alarms, contaminated steam, and pressure fluctuations. High dissolved solids, chemical overfeed, oil contamination, alkalinity imbalance, poor blowdown, and sudden load changes can all contribute to unstable water behavior inside the boiler.
If the water level appears to jump rapidly, if the gauge glass looks unstable, if steam quality has declined, or if downstream equipment shows signs of water carryover, review boiler water conductivity, total dissolved solids, pH, alkalinity, hardness leakage, chemical feed rate, condensate contamination, and blowdown operation. A feedwater control problem may be made worse by foaming because the level transmitter may sense unstable water conditions. Conversely, overfeeding can create high water and carryover.
| Water Chemistry Problem | Possible Level/Feedwater Symptom | Corrective Action |
|---|---|---|
| High dissolved solids | Foaming, unstable level, carryover | Adjust blowdown and review water treatment |
| Hardness leakage | Scale, poor heat transfer, overheating risk | Inspect softener/demineralizer and chemical program |
| Chemical overfeed | Foaming or unstable water surface | Review dosing rates and water test results |
| Oil contamination | Severe foaming, poor steam quality | Find contamination source and isolate condensate |
| Low pH or oxygen issues | Corrosion risk | Review deaeration and chemical treatment |
| Excessive blowdown | Low efficiency, makeup water increase | Verify conductivity control and valve condition |
Do not adjust level controls until water chemistry problems are considered. A control loop cannot perform well if the boiler water surface is unstable because of foaming or contamination.
Step 7: Validate Level Controls, Transmitters, and Control Logic
Instrumentation problems are common in water level and feedwater troubleshooting. A level transmitter may drift, impulse lines may plug, electrodes may foul, wiring may fail, or control scaling may be incorrect. The level controller may be tuned poorly, causing hunting, overfeeding, or delayed response. In more advanced systems, three-element control may depend on steam flow, feedwater flow, and drum level signals; if one of these signals is wrong, the whole control strategy can become unstable.
Compare level signal with gauge glass, feedwater flow, steam flow, pump status, and valve movement. If the level signal falls but feedwater and steam flow do not support that change, validate the transmitter. If the controller output oscillates rapidly, review tuning and signal filtering. If the boiler experiences level swings after a process load change, review whether the control system properly handles shrink and swell. If the system uses two-element or three-element control, verify that steam flow and feedwater flow meters are accurate.
| Control/Instrument Issue | Symptom | Diagnostic Action |
|---|---|---|
| Level transmitter drift | Gauge glass and panel disagree | Calibrate transmitter and inspect impulse lines |
| Plugged impulse line | Slow or false level response | Clean and verify impulse piping |
| Poor controller tuning | Level hunting or overcorrection | Review PID settings and load response |
| Faulty flow meter | Three-element control unstable | Validate steam/feedwater flow signals |
| Valve position feedback error | Controller output does not reflect real valve movement | Check positioner and feedback calibration |
| Electrical noise | Erratic signal | Inspect shielding, grounding, wiring |
| Incorrect scaling | Wrong display or control response | Verify control system engineering units |
Instrumentation should be validated before replacing pumps or valves. Many expensive mechanical repairs have been performed unnecessarily because the true problem was a bad signal.
Step 8: Troubleshoot Pump Electrical and Mechanical Condition
Feedwater pumps are both hydraulic and mechanical assets. Electrical problems can appear as pump failure, reduced speed, intermittent operation, or nuisance trips. Mechanical problems can appear as vibration, noise, seal leakage, overheating, pressure loss, or high current. A complete troubleshooting process includes motor, coupling, bearings, seals, impeller, pump casing, baseplate, alignment, VFD, starter, overload protection, and control logic.
For motor-driven pumps, check voltage, current balance, motor temperature, insulation condition where appropriate, overload trips, VFD faults, speed command, and motor rotation. For mechanical inspection, check alignment, coupling wear, bearing temperature, lubrication, seal leakage, shaft condition, vibration spectrum where available, and signs of rubbing or cavitation damage. If the pump has recently been serviced, verify that it was reassembled correctly and that rotation direction is correct.
| Pump Area | Problem | Typical Symptom |
|---|---|---|
| Motor | Voltage imbalance, overload, winding issue | Trips, overheating, high current |
| VFD/starter | Fault, wrong speed command, parameter issue | Pump speed unstable or too low |
| Coupling | Wear or misalignment | Vibration, noise, bearing stress |
| Bearings | Wear, poor lubrication | Heat, vibration, noise |
| Mechanical seal | Wear, dry running, misalignment | Leakage |
| Impeller | Wear, blockage, cavitation damage | Low pressure and low flow |
| Pump casing | Internal wear or erosion | Reduced performance |
| Baseplate | Soft foot or poor alignment | Recurring vibration |
If a pump repeatedly damages bearings or seals, do not only replace the failed part. Investigate cavitation, alignment, suction conditions, vibration, piping strain, and operating point.
Step 9: Distinguish Between Pump Failure and System Demand Problems
Sometimes the feedwater pump is blamed when the real problem is excessive boiler demand, poor control strategy, or hydraulic design limitation. If steam load increases suddenly, the boiler may require rapid feedwater response. If the pump and control valve are undersized, level may drop during peak demand even if both are mechanically healthy. If the control valve is oversized, it may be difficult to control at low flow. If the pump operates too far from its best efficiency point, it may be unstable.
Review the boiler load profile. Does low water occur during startup, batch heating, sterilization, cleaning, or simultaneous process demand? Does it occur only at high fire? Does the pump maintain pressure at low load but fail at high load? Does the feedwater valve reach fully open while level continues falling? These signs suggest the feedwater system may not have enough capacity or control range for the actual plant demand.
| Pattern | Likely Interpretation | Engineering Review Needed |
|---|---|---|
| Level stable at low load, drops at peak load | Pump/valve capacity or load spike issue | Check sizing and peak steam demand |
| Valve 100% open, level still falling | Insufficient feedwater capacity | Review pump curve and piping losses |
| Pump pressure collapses at high flow | Suction restriction or pump undersizing | Review NPSH and pump selection |
| Level overshoots at low load | Oversized valve or poor tuning | Review valve sizing and control range |
| Problems started after new process equipment | Increased steam demand | Recalculate boiler and feedwater load |
A proper solution may require pump upgrade, control valve resizing, accumulator strategy, load scheduling, condensate recovery improvement, or boiler capacity review.
Step 10: Use IoT, AI, and Predictive Maintenance for Feedwater Reliability
Modern boiler management can detect feedwater problems earlier by monitoring pump vibration, motor current, suction pressure, discharge pressure, flow rate, water level, feedwater valve position, deaerator level, feedwater temperature, conductivity, makeup water, condensate return, and alarm history. IoT sensors provide continuous data. AI can compare patterns and identify early degradation. Predictive maintenance can turn warnings into planned inspection or repair.
For example, rising pump vibration and motor current may suggest bearing wear or cavitation. A growing mismatch between feedwater valve command and actual position may indicate valve stiction. Falling feedwater temperature and rising makeup water may suggest condensate loss. Repeated level-control oscillation may suggest poor tuning, transmitter noise, or valve response delay. AI-based alerts are most useful when they explain the evidence and recommend action, such as “Feedwater Pump 1 vibration has increased 30% during high-load operation, suction pressure is lower than baseline, and discharge pressure is unstable. Inspect suction strainer, deaerator level control, and pump bearings during the next planned maintenance window.”
| Monitored Signal | Early Warning Pattern | Predictive Maintenance Action |
|---|---|---|
| Pump vibration | Gradual increase | Inspect bearings, alignment, cavitation |
| Motor current | Rising at same flow | Check mechanical drag or hydraulic restriction |
| Suction pressure | Falling during high load | Inspect strainer, suction valve, tank level |
| Discharge pressure | Unstable or declining | Check pump wear, cavitation, valve position |
| Feedwater valve position | Command-position mismatch | Stroke test valve and inspect actuator |
| Water level | Frequent oscillation | Check tuning, transmitter, valve response |
| Feedwater temperature | Falling unexpectedly | Inspect condensate return and deaerator |
| Makeup water | Rising | Look for condensate loss or steam leaks |
Water Level, Feedwater, and Pump Troubleshooting Priority Matrix
| Priority | Problem Area | Risk Level | First Action |
|---|---|---|---|
| 1 | Low water level confirmed | Critical | Follow boiler safety procedure and verify feedwater supply |
| 2 | Water level uncertain or instruments disagree | Critical | Validate level through approved indicators |
| 3 | Feedwater pump not running | Critical-high | Check power, motor, starter, VFD, permissives |
| 4 | Pump running but no flow | High | Check suction, discharge, valves, strainer, cavitation |
| 5 | Pump cavitation | High | Restore suction condition and prevent pump damage |
| 6 | Feedwater valve not responding | High | Inspect actuator, positioner, control signal, valve body |
| 7 | Deaerator or tank level unstable | High | Check makeup, condensate return, level control |
| 8 | Level hunting or overfeeding | Medium-high | Check controller tuning, valve sizing, transmitter accuracy |
| 9 | Water chemistry causing foaming | Medium-high | Review conductivity, chemicals, contamination, blowdown |
| 10 | Repeat pump failures | Long-term high | Perform root-cause analysis and predictive maintenance |
Practical Field Troubleshooting Workflow
A practical troubleshooting workflow should move from safety to root cause. First, confirm the boiler water level and active alarms. Second, verify whether the boiler is safe to continue operating. Third, check whether the feedwater pump is running and whether it is producing pressure and flow. Fourth, inspect suction conditions, including tank level, suction valves, strainers, feedwater temperature, and cavitation signs. Fifth, inspect discharge conditions, including check valves, control valves, isolation valves, and piping restrictions. Sixth, validate level instrumentation and control logic. Seventh, review deaerator, condensate return, makeup water, and water chemistry. Eighth, inspect pump mechanical and electrical condition. Ninth, document the root cause and confirm the repair with operating data.
| Step | Action | Decision Point |
|---|---|---|
| 1 | Check alarms, water level, burner status | Is the boiler safe? |
| 2 | Compare gauge glass and transmitter | Is the level reading reliable? |
| 3 | Check pump running status | Is the pump energized and rotating? |
| 4 | Check suction pressure and tank level | Is the pump receiving enough water? |
| 5 | Check discharge pressure and flow | Is the pump delivering water? |
| 6 | Inspect feedwater valve and check valve | Is water reaching the boiler? |
| 7 | Review deaerator and condensate return | Is feedwater source stable? |
| 8 | Validate level controls and instruments | Is control logic correct? |
| 9 | Inspect mechanical/electrical pump condition | Is equipment degraded? |
| 10 | Record root cause and prevention plan | How will recurrence be avoided? |
Common Root Causes and Corrective Actions
| Root Cause | Typical Symptom | Corrective Action |
|---|---|---|
| Low deaerator/feedwater tank level | Pump cavitation, low flow, level drops | Restore level control, inspect makeup and condensate return |
| Blocked suction strainer | Low suction pressure, noisy pump | Clean strainer and investigate contamination source |
| Pump cavitation | Vibration, rattling noise, unstable discharge pressure | Correct suction head, temperature, restrictions, and NPSH margin |
| Worn pump impeller | Low discharge pressure and low flow | Inspect and repair or replace impeller |
| Wrong pump rotation | Poor pressure after maintenance | Verify rotation direction |
| Feedwater control valve stuck | Low or high boiler water level | Repair actuator, positioner, stem, or valve internals |
| Check valve stuck or leaking | No flow, reverse flow, water hammer | Repair or replace check valve |
| Level transmitter drift | Panel reading disagrees with gauge glass | Calibrate transmitter and inspect impulse lines |
| Poor control tuning | Level hunting or overfeeding | Tune controller and review load response |
| Cold feedwater | Slower steam generation and thermal stress | Restore condensate return and deaerator performance |
| Foaming/carryover | Unstable level and wet steam | Correct water chemistry and blowdown |
| Pump bearing wear | Vibration and heat | Replace bearing and investigate alignment/cavitation |
| Seal failure | Water leakage at pump | Replace seal and check alignment/suction condition |
Common Mistakes to Avoid
One of the most dangerous mistakes is ignoring a low-water alarm because the pump appears to be running. A running pump does not prove adequate feedwater flow. Another mistake is repeatedly restarting the boiler after a low-water trip without confirming the actual water level and feedwater cause. A third mistake is replacing a feedwater pump without checking suction conditions. If the real issue is cavitation caused by low tank level, high feedwater temperature, or blocked strainers, the new pump may fail again. A fourth mistake is tuning the level controller before validating the level transmitter and valve response. Control tuning cannot solve a bad signal or a sticking valve. A fifth mistake is ignoring water chemistry when level readings are unstable. Foaming and carryover can make a mechanical control problem appear worse.
Another common mistake is treating pump seal or bearing failure as an isolated maintenance item. Repeated seal failure often points to misalignment, cavitation, vibration, dry running, or piping strain. Repeated bearing failure may point to poor lubrication, alignment problems, hydraulic imbalance, or operating too far from the pump’s intended range. Good troubleshooting always asks why the part failed, not only which part failed.
Final Summary
Industrial boiler water level, feedwater, and pump problems should be troubleshot with a safety-first, system-level approach. Start by verifying the actual boiler water level using approved indicators. Then determine whether the feedwater pump is running, whether it is producing proper pressure and flow, whether suction conditions are healthy, whether cavitation is present, whether the feedwater control valve and check valves are operating correctly, and whether the deaerator, condensate return, makeup water, water chemistry, and instrumentation are stable. Do not assume that a pump problem is only a pump problem; it may originate from suction restrictions, tank level instability, control valve failure, sensor drift, poor water chemistry, or sudden steam demand.
The most common causes include low feedwater tank level, blocked strainers, cavitation, worn impellers, wrong rotation, failed seals, bearing wear, control valve sticking, check valve failure, transmitter drift, poor level control tuning, cold feedwater, condensate loss, foaming, excessive dissolved solids, and unstable deaerator operation. The best troubleshooting method is to identify the root cause, verify the repair with operating data, and update the maintenance plan so the same water level or feedwater problem does not return.
How Can You Troubleshoot Industrial Boiler Scale, Corrosion, and Water Treatment Problems?
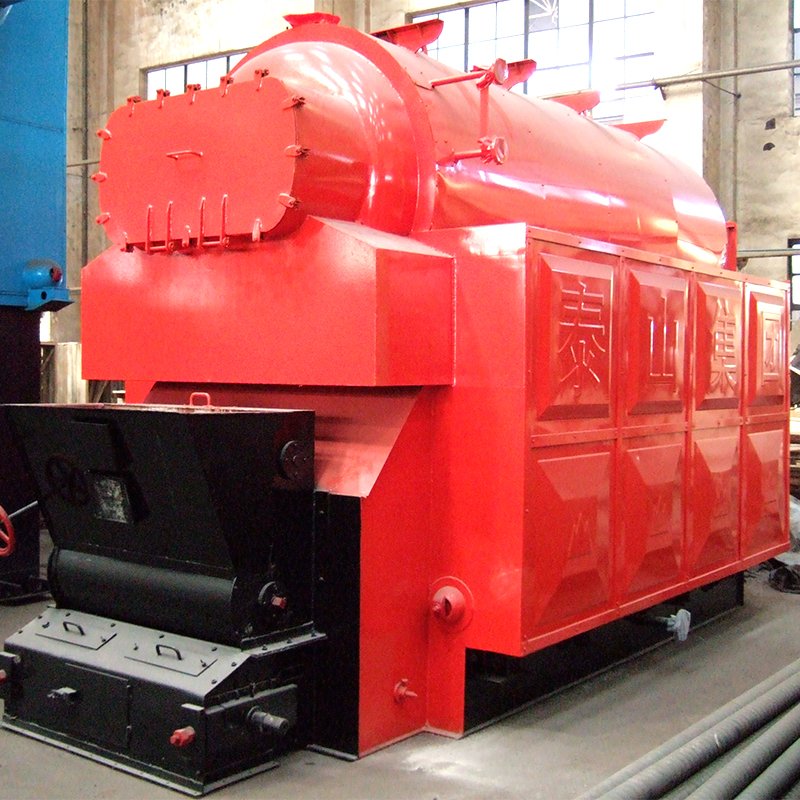
Industrial boiler scale, corrosion, and water treatment problems are dangerous because they often develop silently while the boiler appears to operate normally. A small amount of hardness leakage, oxygen ingress, low pH condensate, poor blowdown control, chemical underdosing, or contaminated return water can gradually reduce heat transfer, overheat tubes, thin metal surfaces, increase fuel consumption, cause leaks, damage steam equipment, and eventually force an unplanned shutdown. The solution is to troubleshoot water treatment problems systematically: identify the symptom, test the correct water points, compare results with operating history, inspect the treatment equipment, verify chemical dosing, review blowdown behavior, check condensate quality, and correct the root cause before the boiler suffers permanent damage.
Industrial boiler scale, corrosion, and water treatment problems can be troubleshot by testing feedwater, boiler water, makeup water, condensate return, and blowdown; inspecting softeners, reverse osmosis systems, deaerators, chemical dosing pumps, oxygen scavenger feed, pH control, conductivity control, and blowdown valves; and comparing water chemistry results with symptoms such as high stack temperature, tube deposits, pitting, leaks, foaming, carryover, high fuel use, or unstable steam quality. The highest priorities are preventing low-water damage, removing hardness leakage, controlling dissolved oxygen, maintaining correct pH and alkalinity, optimizing blowdown, protecting condensate return, and verifying that treatment chemicals are actually reaching the boiler.
Water treatment troubleshooting should never be treated as only a laboratory task. The chemistry results must be connected to real boiler operation, heat-transfer performance, fuel use, steam quality, and maintenance history. As a professional industrial boiler manufacturer and system supplier, we recommend a combined engineering approach: inspect the boiler, test the water, review operating trends, verify treatment equipment, and correct both the chemical condition and the mechanical cause. The following guide explains how to identify common scale, corrosion, and water treatment failures and how to prioritize corrective action in an industrial boiler room.
Boiler scale can increase fuel consumption and create overheating risk because it reduces heat transfer between hot gases and boiler water.True
Scale acts as an insulating layer on heat-transfer surfaces, forcing higher metal temperatures and reducing boiler efficiency.
Clear-looking boiler water always means the boiler water treatment program is working correctly.False
Water can look clear while still containing dissolved solids, hardness, oxygen, incorrect pH, or contaminants that may cause scale, corrosion, foaming, or carryover.
⚠️ Start With Safety and Damage Risk
Scale and corrosion troubleshooting begins with safety. If the boiler shows signs of tube leakage, abnormal metal temperature, severe carryover, water hammer, furnace overheating, unusual noise, rapid pressure instability, repeated low-water events, or visible steam/water leakage, treat the condition as urgent. Water chemistry problems can damage pressure parts, and pressure-part damage must be evaluated by qualified personnel. Do not keep firing a boiler simply because steam is still being produced if there are signs of tube failure, severe overheating, or unsafe water level behavior.
The most important first question is: Is this a chemistry problem, a mechanical problem, or both? In real boiler rooms, the answer is often both. For example, poor softener performance may create scale, but poor blowdown control allows dissolved solids to concentrate. Oxygen ingress may cause corrosion, but a leaking condensate system or poor deaerator operation may be the source. Foaming may be caused by high dissolved solids, but sudden load swings can make carryover worse. A proper troubleshooting process must connect symptoms, test results, equipment condition, and operating patterns.
| Icon | Troubleshooting Area | Key Question |
|---|---|---|
| ⚠️ | Safety | Is there tube leakage, overheating, carryover, or pressure-part risk? |
| 🧪 | Water testing | Which water parameter is outside control? |
| 🪨 | Scale | Is hardness or deposition reducing heat transfer? |
| 🧲 | Corrosion | Is oxygen, low pH, contamination, or poor layup attacking metal? |
| 💧 | Feedwater | Is treated water entering the boiler correctly? |
| 🏭 | Condensate | Is returned condensate clean and chemically stable? |
| 🚿 | Blowdown | Are dissolved solids being controlled without wasting energy? |
| ⚙️ | Treatment equipment | Are softeners, RO, deaerator, and dosing pumps working? |
| 🔧 | Maintenance | What equipment must be cleaned, repaired, or recalibrated? |
| 📋 | Prevention | What operating change prevents recurrence? |
Step 1: Identify the Symptom Before Adjusting Chemicals
The first mistake in water treatment troubleshooting is adjusting chemicals before identifying the actual symptom and source. Adding more chemical may temporarily change a test result, but it may not solve hardness leakage, oxygen ingress, condensate contamination, leaking blowdown valves, failed softener regeneration, poor deaerator venting, blocked chemical feed lines, or incorrect sampling. Before changing dosage, define the problem clearly.
Scale-related symptoms often include rising stack temperature, reduced steam output, higher fuel use, tube overheating, poor heat transfer, hard deposits on tubes, or frequent cleaning requirements. Corrosion-related symptoms include pitting, leaks, reddish or black deposits, iron in condensate, tube thinning, oxygen attack marks, acidic condensate, or recurring pipe failures. Poor water treatment control may also appear as foaming, carryover, wet steam, water hammer, unstable water level, high conductivity, excessive blowdown, or contaminated condensate.
| Symptom | Most Likely Water Treatment Issue | First Diagnostic Priority |
|---|---|---|
| Rising stack temperature | Scale, soot, fouling, poor heat transfer | Compare stack temperature with load and inspect deposits |
| Hard deposits on tubes | Hardness leakage, poor softening, poor chemical control | Test makeup, feedwater, and boiler water hardness |
| Tube pitting | Oxygen corrosion, low pH, poor layup | Check deaerator, oxygen scavenger, pH, condensate |
| Red/brown deposits | Iron corrosion products | Test condensate iron and review corrosion sources |
| Foaming or carryover | High TDS, oil contamination, chemical overfeed | Test conductivity, alkalinity, oil, and treatment dosage |
| High conductivity | Insufficient blowdown or contamination | Check blowdown valve, controller, condensate contamination |
| Excessive blowdown | Wrong setpoint, sensor drift, contamination | Verify conductivity sensor and blowdown logic |
| Low pH condensate | Carbonic acid or contamination | Check condensate pH and neutralizing amine program |
| High makeup water | Condensate loss, steam leaks, trap failure | Inspect condensate return and steam traps |
Step 2: Test the Right Water Points
Effective boiler water troubleshooting requires testing several water points, not only boiler water. A single boiler water sample may show the final condition inside the boiler, but it does not reveal where the problem starts. The key sampling points are raw water, softened or treated makeup water, reverse osmosis outlet where applicable, deaerator outlet or feedwater, boiler water, condensate return, and blowdown. Each point answers a different question.
Raw water tells you the treatment challenge. Treated makeup water tells you whether the softener, demineralizer, or RO system is working. Feedwater tells you what actually enters the boiler after mixing makeup water, condensate, and chemicals. Boiler water tells you concentration level and internal treatment condition. Condensate tells you whether steam-system corrosion, leaks, or process contamination are entering the boiler. Blowdown confirms whether dissolved solids are being removed properly.
| Sample Point | What It Reveals | Important Tests |
|---|---|---|
| Raw water | Incoming hardness and impurities | Hardness, TDS, alkalinity, silica, chloride |
| Softener outlet | Softener performance | Hardness leakage |
| RO/demineralizer outlet | High-purity treatment performance | Conductivity, silica, hardness |
| Deaerator/feedwater | Water entering boiler | pH, temperature, hardness, dissolved oxygen, sulfite/oxygen scavenger |
| Boiler water | Internal concentration and treatment | Conductivity, pH, alkalinity, phosphate, sulfite, silica, TDS |
| Condensate return | Steam system condition | pH, iron, copper, conductivity, oil/contamination |
| Blowdown | Actual concentration control | Conductivity, TDS, suspended solids |
Poor sampling causes poor decisions. Samples should be taken from proper sampling points, cooled where required, flushed correctly, and tested using reliable procedures. Contaminated bottles, stagnant sample lines, hot samples, or inconsistent methods can mislead troubleshooting.
Step 3: Troubleshoot Scale Formation
Scale forms when dissolved minerals precipitate and attach to heat-transfer surfaces. Calcium and magnesium hardness are common causes, but silica, iron, and other minerals can also create deposits depending on water chemistry and boiler pressure. Scale is serious because it acts like insulation. Heat that should transfer into the water remains in the metal and flue gas, increasing tube metal temperature and stack temperature. Even a thin deposit can reduce efficiency and increase overheating risk.
The most common causes of scale are softener failure, hardness leakage, poor regeneration, exhausted resin, incorrect brine concentration, bypass valve leakage, RO membrane problems, insufficient chemical treatment, poor phosphate control, inadequate blowdown, or contaminated condensate. Troubleshooting should begin with treated makeup water hardness. If hardness is present after the softener, the boiler is receiving scale-forming minerals. Then check the softener regeneration cycle, salt level, brine draw, resin condition, valve operation, hardness monitor, and whether untreated water is bypassing the system.
| Scale Cause | Diagnostic Evidence | Corrective Action |
|---|---|---|
| Softener hardness leakage | Hardness in softener outlet | Regenerate, inspect resin, brine system, valves |
| Bypass valve leakage | Treated water hardness varies | Inspect bypass and isolation valves |
| Poor chemical dosing | Low phosphate or dispersant residual | Check dosing pump, tank level, feed line, injection point |
| Inadequate blowdown | High conductivity/TDS | Adjust blowdown and verify controller |
| Silica carryover | High silica in boiler water or steam | Improve pretreatment and concentration control |
| Condensate contamination | Hardness or conductivity spike in condensate | Isolate process leak source |
| Poor internal circulation | Localized deposits | Inspect boiler internals and operating conditions |
When scale is suspected, compare stack temperature at similar load before and after the problem developed. If stack temperature is rising while oxygen and firing rate remain similar, heat-transfer loss may be present. Confirm with inspection during a safe outage. Cleaning method should be selected carefully based on deposit type, boiler design, metallurgy, and manufacturer guidance. Chemical cleaning without deposit analysis can create corrosion or incomplete cleaning.
Step 4: Troubleshoot Oxygen Corrosion
Oxygen corrosion is one of the most damaging boiler water problems. Dissolved oxygen can attack metal surfaces and create pitting, especially in feedwater lines, economizers, boilers, and condensate systems. Pitting is dangerous because it can penetrate metal locally even when the rest of the surface appears acceptable. Oxygen corrosion is often linked to poor deaerator performance, low feedwater temperature, insufficient oxygen scavenger, chemical feed failure, air leaks, high makeup water, poor condensate return, or improper boiler layup.
Start by checking deaerator operation. Review feedwater temperature, deaerator pressure, venting, steam supply, spray/tray condition, level stability, and whether makeup water flow has increased. A deaerator cannot perform correctly if it has unstable pressure, poor steam supply, inadequate venting, internal damage, or excessive cold makeup water. Then check oxygen scavenger residual where used, chemical dosing pump operation, chemical tank level, suction/discharge tubing, injection point, and control setting.
| Oxygen Corrosion Cause | Field Evidence | Corrective Action |
|---|---|---|
| Poor deaerator heating | Feedwater temperature below normal | Check steam supply, pressure control, venting |
| Inadequate venting | Oxygen removal poor | Adjust vent and inspect deaerator internals |
| High makeup water | More oxygen entering system | Restore condensate return and repair leaks |
| Oxygen scavenger underfeed | Low residual in feedwater/boiler water | Check chemical pump, tank, feed line |
| Air leak in condensate system | Corrosion products and unstable return | Inspect pumps, receivers, vacuum points, vents |
| Poor wet layup | Corrosion after shutdown | Follow proper layup chemistry and monitoring |
| Intermittent operation | Oxygen enters during standby | Review standby protection and startup procedures |
Corrosion troubleshooting should include visual inspection, deposit analysis, pH review, iron testing, and maintenance history. If tube pitting is found, replacing the tube without correcting oxygen ingress will only delay the next failure.
Step 5: Troubleshoot Low pH, Acidic Condensate, and Carbonic Acid Attack
Condensate corrosion often occurs when carbon dioxide dissolves in condensate and forms carbonic acid, lowering pH and attacking condensate piping. This can produce iron deposits that return to the boiler, increasing sludge and corrosion risk. Low condensate pH may also result from process contamination, chemical imbalance, or inadequate neutralizing amine treatment.
Troubleshooting should include condensate pH, iron, copper where applicable, conductivity, and contamination testing. If condensate pH is low and iron is high, corrosion is likely occurring in the return system. Check neutralizing amine feed, chemical pump operation, distribution, return line condition, steam users, heat exchangers, and makeup water alkalinity. If conductivity suddenly increases, suspect process contamination or heat exchanger leakage.
| Condensate Problem | Symptom | Likely Cause | Corrective Action |
|---|---|---|---|
| Low condensate pH | Corroded return piping, high iron | Carbonic acid attack | Adjust neutralizing amine and review alkalinity |
| High iron | Rust-colored deposits | Return-line corrosion | Inspect piping and improve condensate treatment |
| High conductivity | Sudden contamination | Process leak or chemical ingress | Isolate contaminated return |
| Oil in condensate | Foaming, carryover risk | Process heat exchanger leak | Divert condensate and repair source |
| Low condensate return | More makeup water and oxygen | Trap failures, leaks, pump problems | Repair return system |
Condensate is valuable because it contains heat and treated water, but contaminated condensate is dangerous. A smart boiler room should return good condensate and reject contaminated condensate until the source is identified.
Step 6: Troubleshoot Blowdown and Conductivity Control
Blowdown controls dissolved solids in boiler water. Too little blowdown allows dissolved solids to concentrate, increasing foaming, carryover, scaling, and steam contamination risk. Too much blowdown wastes heat, water, and chemicals. Troubleshooting blowdown means finding the balance between water quality and energy efficiency.
Check boiler water conductivity, blowdown setpoint, automatic blowdown controller, conductivity probe cleanliness, calibration, sample flow, manual blowdown habits, valve operation, and whether condensate contamination is causing conductivity spikes. A dirty conductivity probe may read incorrectly. A leaking blowdown valve may waste energy continuously. A stuck closed valve may allow concentration to rise. Manual blowdown without testing can create inconsistent control.
| Blowdown Issue | Test/Observation | Likely Cause | Corrective Action |
|---|---|---|---|
| Conductivity too high | High boiler water conductivity | Insufficient blowdown or contamination | Increase controlled blowdown and find contamination |
| Conductivity too low | Low TDS but frequent blowdown | Excessive blowdown | Adjust setpoint and verify sensor |
| Conductivity unstable | Rapid changes | Condensate contamination or dosing issue | Test condensate and chemical feed |
| Valve leaking | Hot blowdown line when closed | Seat damage or debris | Repair or replace valve |
| Probe inaccurate | Lab result differs from controller | Fouled or uncalibrated probe | Clean and calibrate probe |
| Blowdown not opening | Conductivity rises | Valve, actuator, controller fault | Inspect control circuit and valve |
Blowdown troubleshooting should always consider water treatment and condensate quality. If contamination causes high conductivity, simply increasing blowdown may protect the boiler temporarily but wastes energy and does not solve the source.
Step 7: Troubleshoot Chemical Dosing Problems
Chemical treatment can fail even when the correct chemicals are selected. Dosing pumps may lose prime, suction tubes may clog, injection quills may plug, chemical tanks may run empty, wrong chemical may be added, concentration may be incorrect, or control signals may fail. The result can be low oxygen scavenger residual, poor pH control, poor phosphate control, scaling, corrosion, or foaming.
Start with the physical feed system. Check chemical tank level, chemical identity, dilution, pump stroke, pump speed, suction line, foot valve, discharge line, injection point, check valve, calibration column, and whether the pump is actually delivering chemical into flowing water. Then compare chemical residuals in feedwater and boiler water. If the pump is running but residual is low, the pump may be air bound, the line may be blocked, the injection point may be plugged, or demand may have increased.
| Dosing Problem | Symptom | Corrective Action |
|---|---|---|
| Empty chemical tank | Sudden loss of residual | Refill and investigate monitoring failure |
| Pump lost prime | Pump runs but no chemical feed | Re-prime and inspect suction line |
| Blocked injection quill | Chemical pump deadheads | Clean or replace injection assembly |
| Wrong chemical concentration | Residual too high or low | Verify dilution and chemical identity |
| Overfeed | Foaming, high alkalinity, unstable level | Reduce feed and test boiler water |
| Underfeed | Corrosion or scale risk | Restore correct feed rate |
| Poor mixing | Localized chemistry problems | Review injection location and feed strategy |
Chemical dosing should be adjusted based on test results and system demand, not guesswork. Excess chemical can be as problematic as insufficient chemical.
Step 8: Troubleshoot Foaming, Priming, and Carryover
Foaming and carryover occur when water or dissolved solids enter the steam leaving the boiler. This can damage steam equipment, contaminate processes, cause water hammer, and destabilize boiler level. Causes include high TDS, high alkalinity, oil contamination, chemical overfeed, sudden load swings, high water level, poor steam separators, or poor boiler design/operation.
Symptoms include wet steam, unstable water level, water hammer, high conductivity in condensate, deposits in steam lines, poor process heating, and frequent high-water or low-water fluctuations. Troubleshooting should include boiler water conductivity, alkalinity, pH, chemical dosage, oil contamination tests, water level control, steam load profile, and separator condition.
| Carryover Cause | Diagnostic Clue | Corrective Action |
|---|---|---|
| High TDS | High conductivity | Increase controlled blowdown |
| Chemical overfeed | Foaming and abnormal residuals | Adjust dosage |
| Oil contamination | Persistent foam and poor separation | Isolate contaminated condensate |
| High water level | Water enters steam outlet | Correct level control |
| Sudden load swings | Priming during rapid demand | Improve load control or steam header management |
| Poor internals | Carryover despite good chemistry | Inspect separators and internals |
Carryover troubleshooting must be handled carefully because it can damage downstream equipment. Restoring dry steam requires both chemistry correction and operating control.
Step 9: Inspect the Boiler Internally and Analyze Deposits
Water testing is essential, but physical inspection confirms the damage mechanism. During a planned outage, inspect waterside surfaces, tubes, drums, mud legs, headers, handholes, manholes, economizers, and blowdown connections. Look for hard white scale, soft sludge, black magnetite, reddish iron oxide, pitting, under-deposit corrosion, oil film, cracking, or localized overheating.
Deposit analysis can identify whether deposits are hardness scale, iron oxide, copper, silica, phosphate sludge, oil contamination, or mixed deposits. This matters because each deposit type points to a different root cause. Hardness scale points to pretreatment or internal treatment failure. Iron oxide points to corrosion in the boiler or condensate system. Oil points to process contamination. Silica may point to concentration control or pretreatment limits.
| Inspection Finding | Likely Meaning | Follow-Up Action |
|---|---|---|
| Hard white deposits | Calcium/magnesium scale | Check softener, hardness leakage, chemical treatment |
| Black deposits | Magnetite or iron oxide | Review corrosion control and oxygen levels |
| Red/brown deposits | Active corrosion products | Inspect condensate and feedwater corrosion |
| Localized pits | Oxygen or under-deposit corrosion | Check deaeration, scavenger, deposit control |
| Oily film | Process contamination | Isolate condensate source |
| Sludge accumulation | Poor blowdown or dispersant control | Improve blowdown and internal treatment |
| Clean metal but high stack temperature | Fireside issue may dominate | Inspect soot, burner, economizer |
Inspection findings should be documented with photos, location, thickness, deposit type, and operating history. This makes future troubleshooting faster and more accurate.
Step 10: Use Operating Data to Separate Water-Side and Fire-Side Problems
High fuel consumption or high stack temperature may be caused by water-side scale, but it can also be caused by fireside soot, excess air, burner drift, or economizer fouling. To troubleshoot correctly, compare operating data. If stack temperature rises and oxygen also rises, combustion excess air may be contributing. If stack temperature rises while oxygen is stable and water chemistry has been poor, scale or fouling may be likely. If economizer feedwater temperature rise declines, the economizer may be fouled. If steam output drops after a period of hardness leakage, water-side scale should be suspected.
| Operating Pattern | Likely Direction | Recommended Check |
|---|---|---|
| Stack temperature rising, O₂ stable | Scale, soot, or fouling | Inspect heat-transfer surfaces |
| Stack temperature rising, O₂ high | Excess air plus possible fouling | Tune burner and inspect surfaces |
| Feedwater temperature falling | Condensate loss or economizer problem | Inspect condensate and economizer |
| Conductivity rising | Insufficient blowdown or contamination | Check blowdown and condensate |
| Makeup water rising | Steam/condensate loss | Inspect traps, leaks, return pumps |
| Iron in condensate rising | Condensate corrosion | Check pH and amine treatment |
This prevents the common mistake of treating every efficiency loss as a combustion problem or every deposit as a chemical problem.
Water Treatment Troubleshooting Priority Matrix
| Priority | Problem Area | Risk Level | First Action |
|---|---|---|---|
| 1 | Tube leak, overheating, severe corrosion | Critical | Follow safety procedure and arrange qualified inspection |
| 2 | Confirmed low water or severe carryover | Critical | Stabilize operation and verify level/water quality |
| 3 | Hardness in treated makeup water | High | Inspect softener/RO and prevent further scale |
| 4 | Oxygen corrosion signs | High | Check deaerator and oxygen scavenger feed |
| 5 | Low pH condensate or high iron | High | Correct condensate corrosion source |
| 6 | High boiler conductivity | Medium-high | Verify blowdown and contamination source |
| 7 | Foaming or wet steam | Medium-high | Test TDS, alkalinity, oil, chemical dosage |
| 8 | Chemical residual abnormal | Medium-high | Inspect dosing system and feed control |
| 9 | Excessive blowdown | Medium | Calibrate conductivity control and valve |
| 10 | Repeated deposits | Long-term high | Perform deposit analysis and root-cause review |
Practical Field Troubleshooting Workflow
| Step | Action | Decision Point |
|---|---|---|
| 1 | Check safety symptoms and boiler status | Is immediate shutdown or inspection required? |
| 2 | Identify the main symptom | Scale, corrosion, foaming, carryover, high TDS, or contamination? |
| 3 | Test makeup, feedwater, boiler water, condensate, and blowdown | Where does the abnormal chemistry begin? |
| 4 | Inspect pretreatment equipment | Is softener, RO, or filtration working? |
| 5 | Check deaerator and oxygen scavenger | Is oxygen being controlled? |
| 6 | Verify chemical dosing system | Is chemical actually entering the system? |
| 7 | Review blowdown control | Are dissolved solids properly managed? |
| 8 | Inspect condensate return | Is contamination or corrosion returning to the boiler? |
| 9 | Inspect boiler internally when safe | What damage or deposits are present? |
| 10 | Correct root cause and update maintenance plan | How will recurrence be prevented? |
Common Root Causes and Corrective Actions
| Root Cause | Typical Symptom | Corrective Action |
|---|---|---|
| Softener failure | Hardness in feedwater, scale deposits | Regenerate, repair valves, replace resin, verify brine system |
| RO membrane problem | Conductivity or silica increase | Clean, repair, or replace membrane; check pretreatment |
| Poor deaerator operation | Oxygen corrosion, pitting | Check steam supply, venting, trays/spray, temperature |
| Oxygen scavenger underfeed | Low residual, corrosion | Repair dosing system and adjust feed |
| Low condensate pH | Return-line corrosion, high iron | Adjust neutralizing amine and check steam/condensate balance |
| Condensate contamination | Conductivity spike, foaming, oil | Isolate source and repair process heat exchanger |
| Excessive blowdown | High fuel, water, and chemical loss | Calibrate conductivity control and repair valve |
| Insufficient blowdown | High TDS, carryover risk | Restore blowdown schedule/control |
| Chemical overfeed | Foaming, unstable level | Reduce dosage and verify control logic |
| Blocked chemical line | No residual despite pump operation | Clean injection point and feed line |
| Poor layup | Corrosion after shutdown | Apply correct wet/dry layup procedure |
| Failed steam traps | Low condensate return, high makeup | Survey and replace failed traps |
Prevention: Build a Reliable Water Treatment Control Program
The best way to prevent scale and corrosion is to make water treatment a controlled operating system, not an occasional test. A reliable program includes daily or shift-based testing, clear control limits, calibrated instruments, proper chemical storage, functional dosing pumps, regular softener checks, deaerator inspection, condensate monitoring, blowdown verification, steam trap maintenance, and internal inspections. Operators should know what each test means and what action is required when a result moves outside the target range.
IoT and predictive maintenance can improve water treatment reliability. Online conductivity, feedwater temperature, makeup water, blowdown flow, condensate return temperature, pH where applied, pump status, and chemical tank level monitoring can reveal early problems. AI-based analysis can detect patterns such as rising makeup water, unstable conductivity, falling feedwater temperature, or blowdown waste. Predictive maintenance can schedule softener service, dosing pump repair, valve calibration, trap replacement, or deaerator inspection before damage occurs.
Final Summary
Industrial boiler scale, corrosion, and water treatment problems should be troubleshot by combining water testing, equipment inspection, operating data, and root-cause analysis. Scale usually points to hardness leakage, poor pretreatment, insufficient internal treatment, inadequate blowdown, or contamination. Corrosion often points to oxygen ingress, low pH, poor deaeration, condensate corrosion, contamination, or poor layup. Foaming and carryover may result from high dissolved solids, oil contamination, chemical overfeed, high water level, or sudden load swings. Blowdown problems may waste energy or allow dissolved solids to concentrate.
The correct troubleshooting priority is safety first, then sampling, pretreatment verification, deaerator and oxygen control, chemical dosing, blowdown control, condensate quality, internal inspection, and prevention. The best boiler teams do not only clean deposits or replace damaged tubes; they identify why the deposits or corrosion occurred and update the water treatment program so the same problem does not return.
How Can You Troubleshoot Industrial Boiler Safety Valve, Noise, Leakage, and Efficiency Problems?
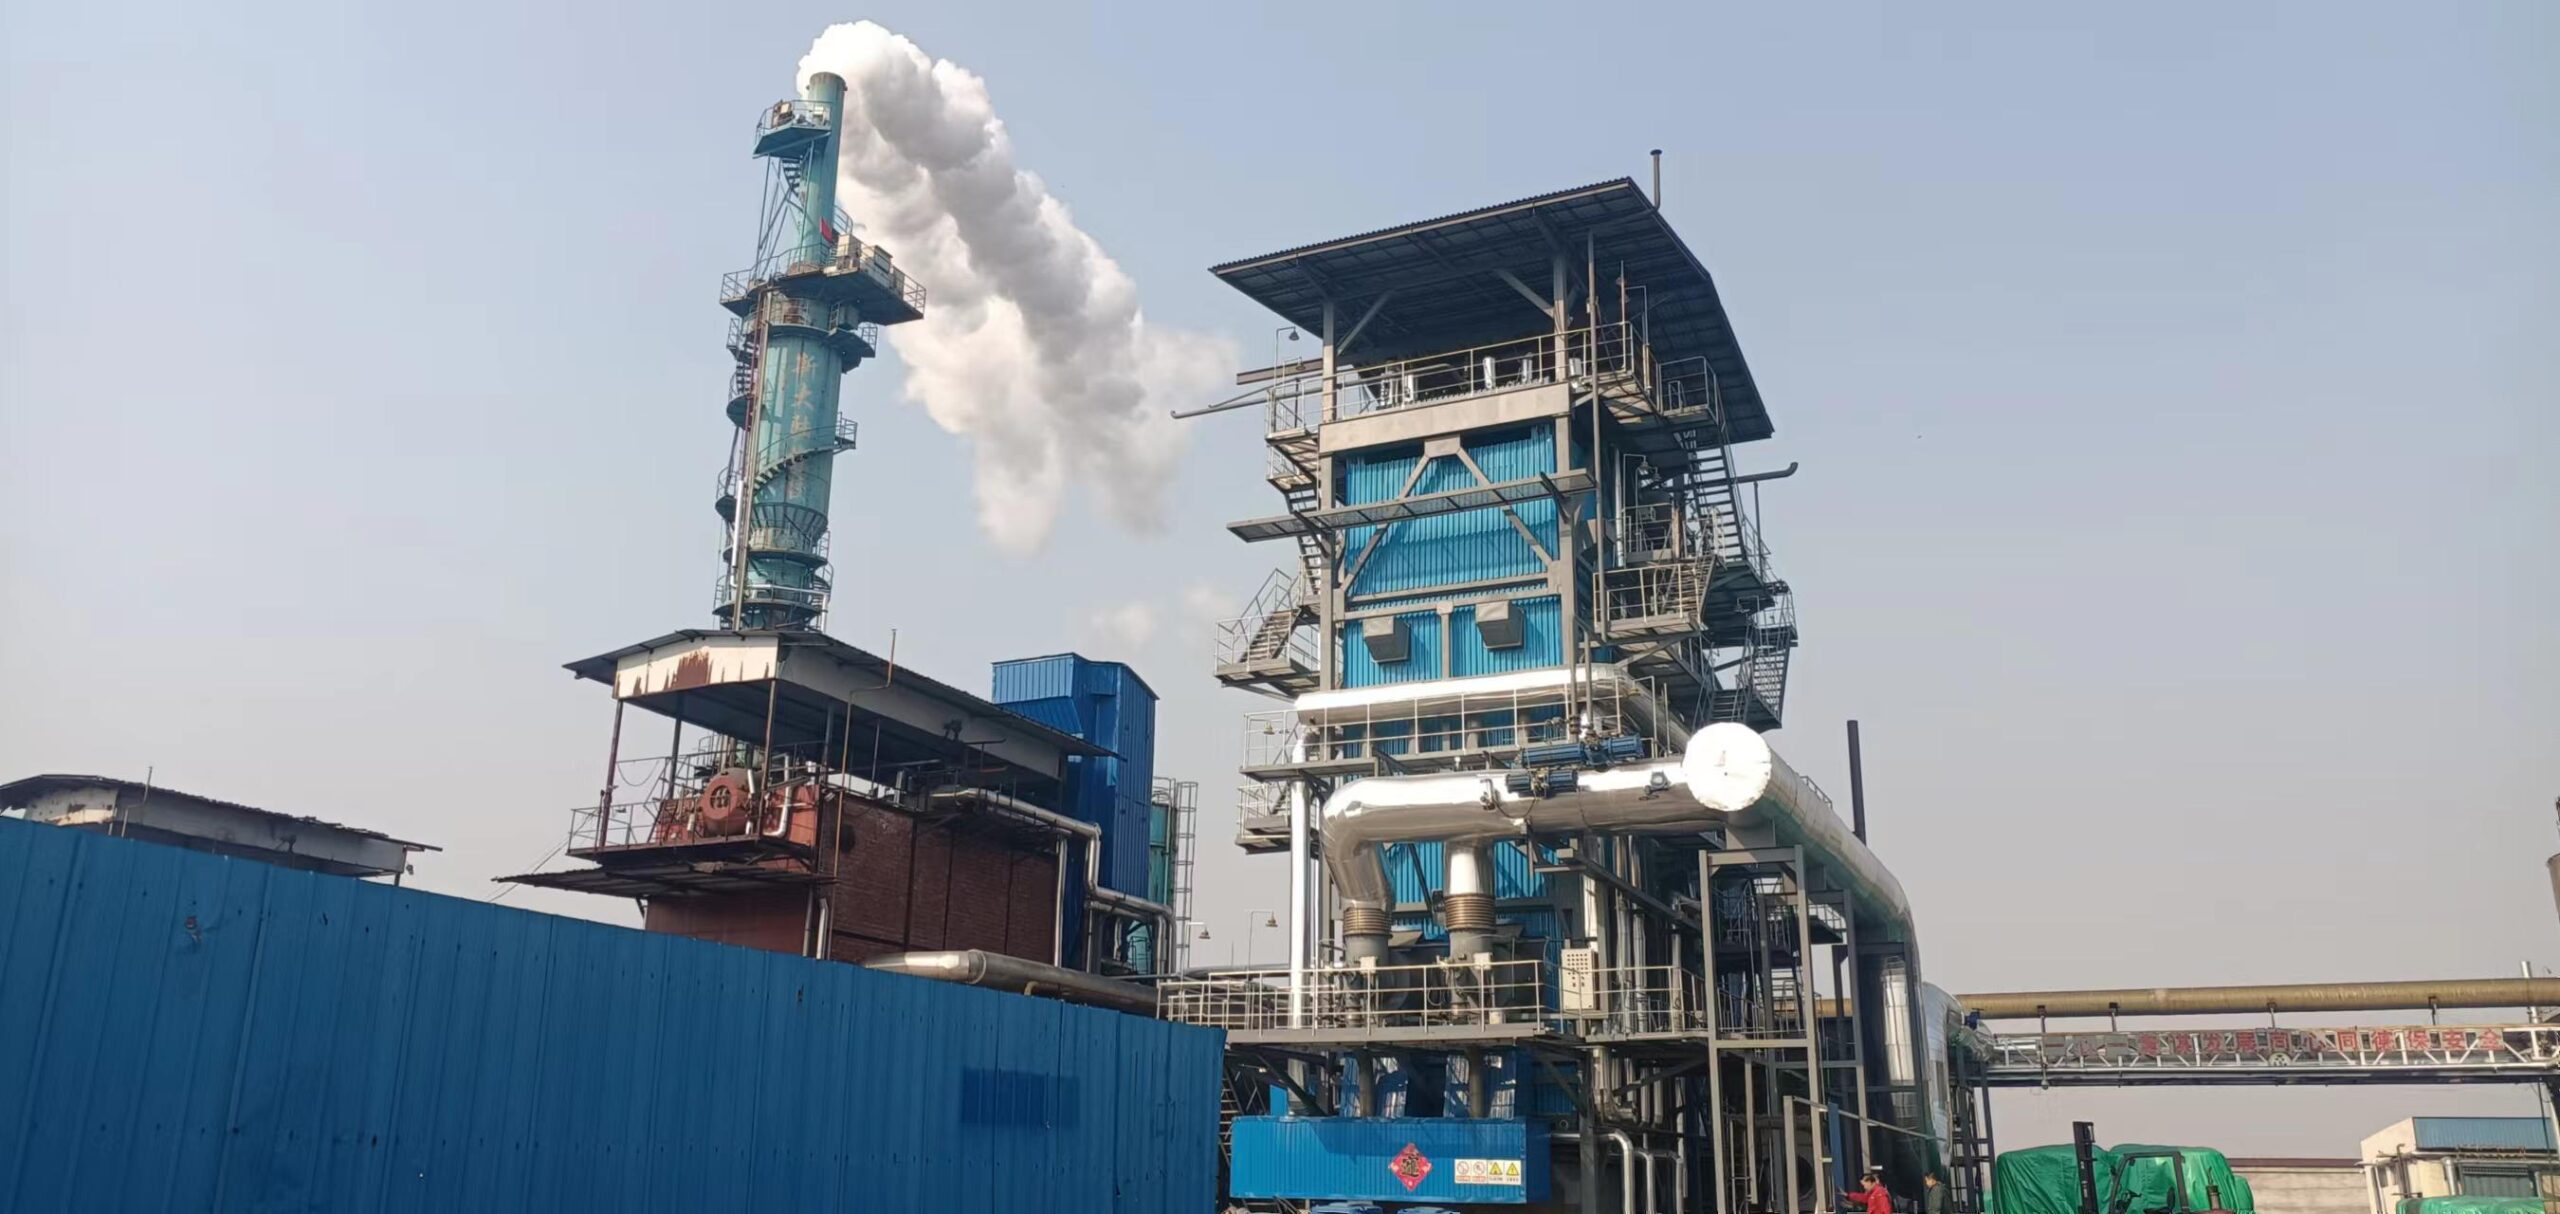
Industrial boiler problems such as safety valve lifting, abnormal noise, steam leakage, water leakage, and poor efficiency should never be treated as minor operating annoyances. A safety valve that lifts frequently may indicate pressure-control failure, load instability, incorrect setpoint, or valve damage. A noisy boiler room may reveal water hammer, pump cavitation, burner pulsation, steam trap failure, or unstable combustion. Leakage may waste energy, damage insulation, create burn hazards, accelerate corrosion, and reduce steam pressure. Efficiency loss may silently increase fuel cost for months before anyone identifies the cause. The practical solution is to troubleshoot these issues in a safety-first sequence: stabilize the boiler, verify pressure and water level, identify the source of noise or leakage, inspect pressure controls and safety devices, review combustion and heat transfer, and correct the root cause rather than repeatedly resetting, tightening, or ignoring the symptom.
Industrial boiler safety valve, noise, leakage, and efficiency problems can be troubleshot by first confirming safe pressure, water level, burner status, and operating conditions, then checking whether the safety valve is lifting due to real overpressure, valve seat leakage, incorrect pressure control, or downstream steam system instability. Noise should be traced to its source, such as water hammer, pump cavitation, burner pulsation, steam leakage, valve chatter, fan vibration, or condensate problems. Leakage should be classified as steam, water, fuel, condensate, blowdown, or valve leakage. Efficiency problems should be diagnosed through fuel flow, steam output, oxygen, stack temperature, feedwater temperature, blowdown, condensate return, steam traps, insulation, and heat-transfer condition.
These four problem groups are connected more often than they appear. For example, a failed steam trap can cause water hammer noise, reduce condensate return, increase makeup water, waste fuel, and contribute to pressure instability. A leaking safety valve can reduce steam pressure, waste energy, and create a dangerous discharge condition. Excessive boiler cycling can cause pressure swings, burner noise, valve wear, and efficiency loss. As a professional industrial boiler manufacturer and system supplier, we recommend a structured troubleshooting method that ranks hazards first, then identifies mechanical, combustion, water, control, and steam-system causes with clear evidence.
A boiler safety valve that lifts repeatedly should be treated as a serious operating condition, not a normal pressure-control method.True
Safety valves are protective devices for relieving overpressure. Repeated lifting may indicate pressure-control problems, load instability, incorrect settings, or valve damage that requires qualified investigation.
A small steam leak in an industrial boiler room has no effect on efficiency or safety.False
Even small steam leaks can waste fuel and treated water, reduce system pressure, damage insulation, create burn hazards, and worsen over time if not repaired.
⚠️ Start With Safety: Do Not Troubleshoot Around an Active Hazard
The first priority is to decide whether the boiler can be safely inspected while operating or whether it must be isolated according to site procedures. Safety valve discharge, live steam leakage, fuel leakage, water hammer, severe vibration, burner rumbling, high-pressure alarms, low-water alarms, unusual furnace noise, electrical burning smell, or visible pressure-part leakage are not conditions to investigate casually. Operators should keep clear of safety valve discharge paths, leaking flanges, hot condensate lines, unstable piping, and rotating equipment. Troubleshooting should always follow plant lockout, isolation, pressure relief, confined-space, hot-work, and manufacturer procedures.
A practical safety check begins with four questions: Is steam pressure within the approved operating range? Is boiler water level verified and stable? Is combustion stable and properly controlled? Is there any visible leak, noise, vibration, or discharge that could injure personnel or damage equipment? If the answer to any of these questions is uncertain, the problem should be escalated to qualified boiler personnel before adjustments are made. Never gag, plug, cap, or block a safety valve. Never tighten a live steam flange without an approved procedure. Never ignore water hammer because it “has always sounded that way.” Never adjust burner combustion by sight alone when efficiency or noise problems appear.
| Icon | Problem Area | Immediate Question | Urgency |
|---|---|---|---|
| ⚠️ | Safety valve discharge | Is the boiler overpressure or is the valve leaking? | Critical |
| 🔊 | Noise | Is the sound caused by water hammer, combustion, pump, fan, or valve chatter? | High |
| 💨 | Steam leakage | Is live steam escaping from valve, flange, trap, gasket, or piping? | High |
| 💧 | Water leakage | Is the leak from boiler pressure parts, feedwater, blowdown, condensate, or pump seals? | High |
| 🔥 | Combustion efficiency | Is fuel being burned cleanly and efficiently? | Medium-high |
| 🧱 | Heat transfer | Are soot, scale, or fouling increasing stack loss? | Medium-high |
| 🚿 | Blowdown | Is hot treated water being wasted? | Medium |
| ♻️ | Condensate return | Is recovered heat being lost? | Medium-high |
| 🎛️ | Controls | Are pressure, level, and burner controls stable? | Medium-high |
| 🔧 | Maintenance | What repair prevents recurrence? | Long-term high |
Troubleshooting Industrial Boiler Safety Valve Problems
A safety valve is not a normal pressure-control valve; it is a final protective device intended to relieve pressure when pressure rises above its set condition. If a safety valve lifts, leaks, chatters, or fails to reseat properly, the event must be taken seriously. Troubleshooting begins by identifying whether the valve lifted because the boiler pressure truly exceeded the set pressure, or whether the valve itself is leaking or damaged. This distinction matters because the corrective action is different. A true overpressure event points toward pressure-control failure, load rejection, burner modulation problem, downstream valve closure, incorrect boiler sequencing, or pressure transmitter error. A leaking valve at normal pressure points toward seat damage, contamination, improper reseating after a lift, corrosion, spring fatigue, incorrect installation, or discharge piping stress.
Start by reviewing the pressure trend before the safety valve event. Did steam pressure rise steadily above the normal operating band? Did pressure spike after a sudden process shutdown? Did the burner continue firing when demand dropped? Did a downstream isolation valve close? Did multiple boilers continue firing into a low-demand header? Did the pressure transmitter and local gauge agree? Did the safety valve discharge once and reseat, or does it continue to leak? If the valve leaks after lifting, the seat may have been damaged by debris, wet steam, corrosion, or repeated cycling.
| Safety Valve Symptom | Likely Cause | Diagnostic Check | Corrective Priority |
|---|---|---|---|
| Safety valve lifts at high pressure | Real overpressure | Review pressure trend, burner firing rate, load rejection, control output | Critical |
| Valve leaks below set pressure | Seat damage, debris, corrosion, poor reseating | Listen/observe discharge safely, check temperature downstream | High |
| Valve chatters | Oversized valve, inlet pressure drop, unstable pressure, poor installation | Review installation, inlet piping, pressure fluctuation | High |
| Frequent lifting | Pressure-control problem, narrow operating margin, load swings | Check pressure controller, burner modulation, steam demand | High |
| Valve fails to reseat | Seat damage, contamination, mechanical defect | Qualified inspection and service | Critical-high |
| Discharge piping vibrates | Reaction force, poor support, condensate accumulation | Inspect support and drainage | High |
| Valve lift at normal indicated pressure | Pressure instrument error or incorrect valve setting | Verify gauge/transmitter and authorized valve test | High |
Safety valve service should be performed only by qualified and authorized personnel according to applicable rules and site requirements. Operators should not adjust set pressure, add weight, block discharge, or modify the valve. If a valve is leaking, the correct response is not to “tap it harder” or tighten random components; the correct response is to verify system pressure, protect personnel, document the condition, and arrange proper inspection or replacement.
Why Safety Valves Lift Repeatedly
Repeated safety valve lifting usually means the boiler pressure-control system is not managing steam generation smoothly. Common causes include sudden process load rejection, pressure controller malfunction, incorrect PID tuning, burner actuator delay, oversized boiler operating at low load, poor multi-boiler sequencing, stuck steam control valves, blocked downstream flow, or pressure transmitter drift. In some plants, the safety valve lifts because the normal operating pressure is set too close to the valve set pressure, leaving no stable margin for load changes.
A useful troubleshooting sequence is to compare boiler pressure, steam header pressure, burner firing rate, controller output, steam demand, downstream valve status, and safety valve event timing. If pressure rises after a large user closes suddenly, load management may be needed. If the burner remains at high fire after pressure rises, check modulation control and actuator response. If pressure indication is unstable, validate the pressure transmitter. If the safety valve lifts during startup, warm-up procedures and pressure ramp rate should be reviewed. If multiple boilers are connected, check whether lead-lag controls are causing boilers to overshoot.
Troubleshooting Abnormal Boiler Noise
Noise is a diagnostic signal. The key is to identify where the sound comes from and what operating condition triggers it. Boiler noise can come from water hammer, steam leaks, burner pulsation, combustion rumble, feedwater pump cavitation, fan imbalance, valve chatter, safety valve leakage, condensate return problems, pressure-reducing valves, expansion movement, refractory damage, or loose casing components. A random description such as “the boiler is noisy” is not enough. The troubleshooting team should classify the noise by location, timing, frequency, intensity, and relation to load.
Water hammer is one of the most serious noise problems in steam systems. It may sound like banging, knocking, or hammering in steam or condensate piping. It can be caused by condensate accumulation, failed steam traps, poor pipe slope, rapid valve opening, wet steam, undersized condensate return, blocked strainers, or improper startup warm-up. Water hammer can damage valves, traps, elbows, flanges, supports, and heat exchangers. It should be corrected promptly.
Pump cavitation often sounds like gravel or crackling inside the pump. It may be accompanied by vibration, unstable discharge pressure, seal leakage, and falling flow. Burner rumble or pulsation may indicate unstable combustion, poor draft, incorrect air-fuel ratio, dirty burner components, or fuel pressure instability. Fan noise may indicate bearing wear, imbalance, rubbing, loose belts, or VFD issues. Valve chatter may indicate unstable pressure, incorrect sizing, poor flow conditions, or control-loop hunting.
| Noise Type | Likely Source | Common Cause | Troubleshooting Action |
|---|---|---|---|
| Loud banging | Steam/condensate piping | Water hammer, failed traps, condensate pooling | Inspect traps, drainage, startup procedure, pipe slope |
| Gravel-like pump noise | Feedwater or condensate pump | Cavitation, suction restriction, hot water, low tank level | Check suction pressure, strainer, tank level, NPSH margin |
| Deep rumbling | Burner/furnace | Combustion instability, draft issue, fuel-air mismatch | Inspect fuel pressure, air damper, burner setup, draft |
| High-pitched hiss | Steam leak or valve leakage | Leaking gasket, valve packing, safety valve seat | Locate safely and repair during planned isolation |
| Chattering | Control valve or safety valve | Oversizing, pressure fluctuation, poor installation | Review pressure trend, valve sizing, control loop |
| Fan vibration noise | Combustion fan | Bearing wear, imbalance, rubbing, loose foundation | Inspect fan, bearings, alignment, vibration |
| Knocking during startup | Steam lines | Rapid warm-up, condensate not drained | Improve warm-up and drain procedure |
| Rattling casing | Boiler casing or refractory | Loose panels, vibration, refractory damage | Inspect during outage |
Troubleshooting Water Hammer and Condensate Noise
Water hammer deserves special attention because it is both a noise problem and a safety problem. In steam systems, water hammer usually occurs when steam pushes a slug of condensate at high velocity or when flashing condensate creates pressure shock. The source may be far from where the sound is heard. Common causes include failed-open or failed-closed traps, blocked trap strainers, insufficient drip legs, poor line slope, low points without drainage, steam valves opened too quickly, condensate pumps cycling poorly, or wet steam leaving the boiler due to carryover.
A good diagnostic method is to map the noise location against steam startup, process operation, trap discharge, condensate pump cycling, and boiler water level behavior. If hammer occurs during startup, warm-up and drainage procedures are likely involved. If it occurs during normal operation near a heat exchanger, check trap function and condensate removal. If it occurs in return lines, check condensate pump operation, flash steam handling, check valves, and return-line pressure. If it occurs after boiler water level instability, investigate carryover and water chemistry.
Troubleshooting Steam, Water, Condensate, and Fuel Leakage
Leakage should be classified by fluid type and risk. Steam leakage is dangerous because it can be invisible at high pressure and cause severe burns. Water leakage from pressure parts may indicate corrosion, cracking, gasket failure, tube leakage, or mechanical damage. Condensate leakage wastes heat and treated water. Blowdown leakage wastes hot concentrated boiler water. Fuel leakage is an immediate safety hazard and must be handled according to emergency procedures. Valve packing leakage, flange leakage, gasket leakage, pump seal leakage, safety valve leakage, and trap leakage each have different causes.
Steam leaks often occur at flanges, valve stems, gaskets, unions, threaded fittings, steam traps, pressure-reducing stations, expansion joints, and safety valve seats. Causes include thermal cycling, vibration, poor gasket installation, corrosion, erosion, overpressure, pipe stress, water hammer, or valve wear. Water leaks may occur at handholes, manholes, gauge glass fittings, feedwater pumps, boiler tubes, economizers, blowdown valves, or condensate tanks. If a leak appears at a pressure part, it should be inspected by qualified personnel. Do not assume it is only a gasket if corrosion or cracking is possible.
| Leakage Type | Common Location | Likely Cause | Priority |
|---|---|---|---|
| Live steam leak | Flange, valve stem, trap, PRV, safety valve | Gasket failure, packing wear, seat leakage, pipe stress | High |
| Boiler water leak | Handhole, manhole, tube, blowdown line | Gasket failure, corrosion, cracking, pressure-part damage | Critical-high |
| Feedwater leak | Pump seal, valve, flange, piping | Seal wear, vibration, pressure cycling, corrosion | Medium-high |
| Condensate leak | Return line, receiver, pump, trap station | Corrosion, water hammer, gasket failure | Medium-high |
| Blowdown leak | Blowdown valve, piping, flash tank | Valve seat damage, erosion, poor closure | Medium-high |
| Fuel leak | Fuel train, oil line, gas valve, regulator | Seal failure, loose fitting, valve defect | Critical |
| Safety valve leak | Discharge outlet | Seat damage, debris, repeated lifting | High |
Leak troubleshooting should include pressure, temperature, vibration, pipe support, gasket material, installation history, thermal expansion, and water hammer evidence. If the same flange or valve leaks repeatedly, the root cause may be misalignment, pipe stress, wrong gasket selection, poor bolting practice, or vibration rather than a simple sealing problem.
Troubleshooting Safety Valve Leakage
A leaking safety valve is a common but serious efficiency and safety issue. Leakage may be detected by sound, heat in the discharge line, visible vapor at the outlet, pressure loss, or energy loss. A safety valve may leak because debris is trapped on the seat, the valve lifted and failed to reseat, the seat is eroded, the spring is damaged, the valve is exposed to excessive vibration, the discharge piping imposes stress, or boiler pressure operates too close to the set pressure.
The first step is to verify that the boiler is not actually operating above the intended pressure range. Then check whether the valve leaked after a lifting event. Review how often the valve lifts. Frequent lifting can damage the seat and turn a pressure-control problem into a valve leakage problem. Also inspect discharge piping for condensate accumulation or improper support, because discharge-side problems can affect valve performance.
Authorized inspection or replacement is usually required for safety valve repairs. Safety valves are not ordinary shutoff valves; they are calibrated protective devices. Any repair must preserve certified performance.
Troubleshooting Efficiency Problems
Boiler efficiency problems are often hidden because the boiler may continue producing steam while wasting fuel. Efficiency troubleshooting begins by comparing fuel input with useful steam output. A plant should review fuel flow, steam flow, feedwater temperature, stack temperature, oxygen, burner firing rate, blowdown, condensate return, makeup water, steam trap condition, insulation, and operating load. Without these measurements, teams often guess.
The most common efficiency loss sources are excessive combustion air, poor burner tuning, high stack temperature, soot, scale, economizer fouling, excessive blowdown, low condensate return, steam leaks, failed steam traps, poor insulation, short cycling, poor boiler sequencing, inaccurate sensors, and poor load matching. A useful rule is to separate combustion loss, heat-transfer loss, water/condensate loss, and distribution loss.
| Efficiency Problem | Symptom | Likely Cause | Corrective Action |
|---|---|---|---|
| High oxygen | High stack loss, excess air | Burner drift, damper issue, actuator wear, analyzer error | Tune burner and calibrate oxygen analyzer |
| High stack temperature | Fuel waste, slow steam recovery | Soot, scale, fouling, excess air, economizer issue | Clean surfaces and inspect water treatment |
| Low feedwater temperature | More fuel required | Poor condensate return, deaerator issue, economizer fault | Restore condensate and heat recovery |
| Excessive blowdown | High water, chemical, and fuel use | Conductivity sensor drift, wrong setpoint, contamination | Calibrate controller and optimize blowdown |
| Rising makeup water | Heat and water loss | Steam leaks, failed traps, condensate leaks | Repair leaks and traps |
| Short cycling | Frequent starts/stops | Oversized boiler, poor sequencing, low demand | Adjust controls or sequencing |
| Poor fuel-to-steam ratio | General efficiency decline | Multiple possible causes | Use trend analysis to identify root cause |
| Economizer underperformance | Low feedwater temperature rise | Fouling, bypass leakage, poor flow | Inspect and clean economizer |
Diagnosing Combustion Efficiency Loss
Combustion efficiency loss is usually linked to air-fuel ratio, burner condition, fuel quality, and draft. Too much excess air heats unnecessary air and sends heat up the stack. Too little air can cause incomplete combustion, soot, smoke, unstable flame, and unsafe conditions. Troubleshooting should include oxygen, carbon monoxide where monitored, stack temperature, fuel pressure, air damper position, burner firing rate, fan speed, flame stability, and burner cleanliness.
Do not tune combustion only by flame appearance. A flame that “looks good” may still have excessive air or unsafe combustion products. Use calibrated combustion instruments and qualified personnel. If oxygen is high across the load range, inspect burner linkage, damper position, actuator calibration, oxygen analyzer accuracy, and air leakage. If soot is present, inspect fuel atomization, air distribution, burner head cleanliness, draft, and fuel quality.
Diagnosing Heat-Transfer Efficiency Loss
Heat-transfer loss occurs when heat from combustion does not efficiently transfer to the boiler water. Fireside soot, ash, and fouling insulate surfaces from the gas side. Waterside scale insulates surfaces from the water side. Economizer fouling reduces feedwater heat recovery. These problems usually show up as rising stack temperature at similar load conditions. Heat-transfer loss can also increase metal temperature and shorten equipment life.
Troubleshooting should compare stack temperature, oxygen, firing rate, feedwater temperature, steam output, and water chemistry history. If stack temperature rises while oxygen remains stable, inspect for soot, scale, or economizer fouling. If water treatment history shows hardness leakage or poor blowdown, waterside scale is likely. If combustion history shows smoke or poor oil atomization, fireside soot is likely. Cleaning should address the deposit and the cause that created it.
Diagnosing Water, Blowdown, and Condensate Efficiency Loss
Hot water and condensate contain valuable heat. When the boiler loses them, it must spend fuel to heat replacement makeup water. Excessive blowdown, leaking blowdown valves, poor condensate return, failed traps, and steam leaks all increase long-term operating cost. Troubleshooting should include makeup water volume, condensate return percentage, feedwater temperature, blowdown frequency, conductivity, trap condition, and visible leaks.
If feedwater temperature is falling, check condensate return and economizer performance. If makeup water is rising, inspect steam leaks, condensate leaks, trap failures, and process heat exchanger contamination. If blowdown is high while boiler conductivity is low, the plant may be wasting treated hot water. If conductivity is unstable, inspect condensate contamination and chemical dosing.
Efficiency Troubleshooting Priority Table
| Priority | Efficiency Area | What to Measure | What It Tells You |
|---|---|---|---|
| 1 | Fuel-to-steam ratio | Fuel flow and steam flow | Overall efficiency trend |
| 2 | Combustion | O₂, CO where monitored, stack temperature | Air-fuel and combustion quality |
| 3 | Heat transfer | Stack temperature at same load | Soot, scale, fouling, economizer loss |
| 4 | Feedwater heat | Feedwater temperature | Condensate return and economizer performance |
| 5 | Blowdown | Conductivity and blowdown flow | Hot water and chemical loss |
| 6 | Steam system | Leaks, traps, condensate return | Distribution losses |
| 7 | Controls | Cycling rate and firing rate | Sequencing and modulation efficiency |
| 8 | Instruments | Sensor calibration | Data reliability |
Troubleshooting Control Problems Behind Safety Valve, Noise, Leakage, and Efficiency Issues
Controls connect many of these symptoms. Poor pressure-control tuning can cause safety valve lifting, valve chatter, burner cycling, pressure noise, and efficiency loss. Poor level-control tuning can cause carryover, water hammer, feedwater valve wear, and pump cycling. Burner modulation problems can cause combustion rumble, pressure instability, high oxygen, and poor fuel economy. In multi-boiler plants, poor lead-lag sequencing can cause one boiler to overload while another cycles, increasing pressure swings and fuel waste.
Troubleshooting controls means comparing setpoint, actual value, controller output, actuator position, valve position, firing rate, and process demand. If pressure rises but firing rate does not decrease, inspect the pressure controller, transmitter, actuator, and control logic. If pressure falls but the burner remains at low fire, inspect modulation signal and low-fire hold conditions. If a valve chatters, check whether the control loop is hunting or whether valve sizing is unsuitable. If the boiler cycles frequently, review boiler sizing, turndown, load profile, and sequencing.
Practical Field Workflow
| Step | Action | Main Decision |
|---|---|---|
| 1 | Verify safety: pressure, water level, flame, fuel, alarms | Is it safe to continue troubleshooting? |
| 2 | Classify the symptom: valve, noise, leak, or efficiency | Which diagnostic path applies? |
| 3 | Check pressure trend and control response | Is pressure control causing safety valve or noise issues? |
| 4 | Locate noise source safely | Water hammer, pump, burner, fan, valve, or leak? |
| 5 | Identify leakage type | Steam, water, condensate, blowdown, fuel, or safety valve? |
| 6 | Measure efficiency indicators | Fuel, steam, O₂, stack temperature, feedwater, blowdown |
| 7 | Inspect mechanical causes | Valves, traps, pumps, fans, burner, economizer, gaskets |
| 8 | Validate instruments | Pressure, oxygen, temperature, flow, conductivity |
| 9 | Repair root cause | Clean, tune, calibrate, replace, support, insulate, or redesign |
| 10 | Verify after repair | Confirm pressure stability, no leak, lower noise, better efficiency |
Common Root Causes and Corrective Actions
| Root Cause | Problem Created | Corrective Action |
|---|---|---|
| Pressure controller malfunction | Safety valve lifting, pressure swings | Calibrate transmitter, tune controller, inspect actuator |
| Operating too close to safety valve set pressure | Frequent valve lifting | Review approved operating pressure margin |
| Safety valve seat damage | Continuous leakage | Arrange authorized valve inspection/service |
| Failed steam traps | Water hammer, steam loss, poor condensate return | Test and replace failed traps |
| Condensate accumulation | Banging noise and pipe stress | Improve drainage, slope, drip legs, startup procedure |
| Pump cavitation | Noise, vibration, feedwater instability | Correct suction pressure, tank level, strainer, NPSH |
| Burner instability | Rumbling, pressure fluctuation, soot | Check fuel pressure, air, draft, burner setup |
| Fan imbalance | Vibration and noise | Inspect bearings, impeller, alignment, foundation |
| Steam leaks | Pressure loss and fuel waste | Repair gaskets, packing, flanges, valves |
| Scale or soot | High stack temperature and poor efficiency | Clean surfaces and correct water/combustion cause |
| Excessive blowdown | Fuel, water, and chemical waste | Calibrate conductivity control and valve |
| Low condensate return | High fuel and water cost | Repair traps, leaks, condensate pumps |
| Poor insulation | Radiation heat loss | Repair insulation and covers |
| Sensor drift | Wrong troubleshooting decisions | Calibrate pressure, oxygen, flow, temperature sensors |
How IoT, AI, and Predictive Maintenance Help
Digital monitoring can make these problems easier to detect before they become serious. IoT sensors can monitor steam pressure, safety valve discharge temperature or acoustic events, fuel flow, steam flow, oxygen, stack temperature, feedwater temperature, blowdown, condensate return, pump vibration, motor current, valve position, fan vibration, and burner flame signal. AI can detect abnormal patterns such as repeated near-overpressure events, slow pressure-control response, rising stack temperature, increasing makeup water, falling condensate return, valve chatter, burner instability, or pump cavitation trends. Predictive maintenance can then create planned work orders for safety valve inspection, trap replacement, burner tuning, pump service, valve repair, economizer cleaning, insulation repair, or sensor calibration.
For example, if the system detects that pressure repeatedly approaches the safety valve set pressure during load rejection, maintenance can inspect pressure controls and boiler sequencing before the valve lifts again. If acoustic monitoring detects a new high-frequency steam leak signature, the plant can inspect the affected valve station. If stack temperature rises at similar load while oxygen remains stable, the system can recommend heat-transfer inspection. If makeup water rises and condensate return falls, steam trap or condensate leakage can be prioritized.
Common Mistakes to Avoid
One mistake is treating safety valve lifting as routine pressure control. It is not. Repeated lifting damages the valve and indicates a control or operating problem. Another mistake is ignoring small steam leaks because production continues. These leaks waste fuel and can worsen quickly. A third mistake is accepting water hammer as normal plant noise. Water hammer can damage piping and equipment. A fourth mistake is tuning the burner to solve efficiency loss without checking scale, soot, condensate return, blowdown, or steam leaks. A fifth mistake is replacing parts without correcting the cause of repeated failure. A leaking flange may be caused by pipe stress, not only a bad gasket. A noisy pump may be caused by suction conditions, not only a worn bearing.
The best troubleshooting practice is to document the event, collect operating data, inspect the physical system, confirm the root cause, complete the repair, and verify improvement. If the same problem returns, the team should escalate from repair to root-cause analysis.
Final Summary
Industrial boiler safety valve, noise, leakage, and efficiency problems should be troubleshot with a safety-first and system-level approach. Safety valve lifting may indicate real overpressure, poor pressure control, load rejection, incorrect operating margin, valve damage, or installation problems. Noise may come from water hammer, pump cavitation, burner rumble, valve chatter, fan vibration, steam leaks, or condensate issues. Leakage may involve steam, boiler water, feedwater, condensate, blowdown, fuel, or safety valve seats. Efficiency problems may result from excess air, high stack temperature, scale, soot, economizer fouling, excessive blowdown, low condensate return, failed traps, steam leaks, poor insulation, or short cycling.
The correct troubleshooting priority is to confirm safe operation, classify the symptom, review pressure and control trends, locate the source, inspect mechanical and combustion systems, validate instruments, repair the root cause, and verify results with data. A boiler room becomes safer and more cost-effective when operators stop treating these symptoms separately and start seeing them as connected signals of pressure control, steam distribution, combustion, water treatment, maintenance, and efficiency performance.
FAQ
Q1: What are the most common industrial boiler problems?
A1: Common industrial boiler problems include low water level, poor water treatment, scale buildup, corrosion, foaming, priming, poor steam quality, burner ignition failure, unstable pressure, combustion inefficiency, soot buildup, tube leaks, faulty controls, feedwater pump problems, steam trap failures, and safety device malfunctions. These issues can reduce efficiency, increase fuel use, interrupt production, and create serious safety risks if ignored.
Low water is one of the most dangerous boiler problems because the boiler tubes or pressure vessel surfaces may overheat when not properly covered by water. A working low-water cutoff is essential, and frequent low-water trips should never be bypassed or treated as a nuisance alarm. The National Board warns that boiler damage commonly results from fuel explosions, low-water conditions, poor water treatment, and improper warm-up. (nationalboard.org)
Water-related problems are also extremely common. Hardness minerals such as calcium and magnesium can form scale on heat-transfer surfaces. Scale acts like insulation, causing overheating, lower efficiency, and possible tube failure. Poor boiler water control can also lead to corrosion, sludge, foaming, moisture carryover, and contaminated steam. The U.S. Department of Energy notes that hardness in boiler water can cause scale buildup and foaming, reducing efficiency and contributing to tube failure. (The Department of Energy’s Energy.gov)
Combustion problems are another major category. Symptoms may include flame instability, delayed ignition, excessive smoke, high stack temperature, high carbon monoxide, low oxygen control accuracy, unusual burner noise, or frequent burner lockouts. EPA boiler tune-up guidance explains that tune-ups focus on reestablishing the proper air-fuel mixture to support safe, efficient combustion. (US EPA)
Operators should treat boiler troubleshooting as a safety-critical task. Simple checks may include reviewing alarms, verifying water level indication, checking fuel supply, inspecting visible leaks, confirming feedwater flow, reviewing blowdown records, and checking operating trends. However, repairs involving burners, pressure parts, safety valves, low-water cutoffs, combustion controls, electrical systems, or pressure-retaining components should be handled by qualified personnel following site procedures, lockout/tagout rules, and applicable codes.
Q2: How do you troubleshoot low water level and feedwater problems in an industrial boiler?
A2: To troubleshoot low water level and feedwater problems, start by treating the condition as urgent. A low-water alarm, low-water cutoff trip, or sudden drop in gauge glass level can indicate a serious unsafe condition. Do not bypass the low-water cutoff or force the boiler to continue firing. The first step is to follow the facility’s emergency operating procedure, reduce load if required, and have qualified personnel verify the actual water level using approved instruments and procedures.
Common causes of low water include feedwater pump failure, closed or partially closed feedwater valves, failed level controls, clogged sensing lines, faulty transmitters, deaerator problems, low condensate return, excessive blowdown, leaking steam traps, sudden steam demand changes, or operator error. In steam boilers, apparent water level may also fluctuate because of swell and shrink. Swell can make the water level appear higher during rapid steam-load changes, while shrink can make it appear lower when steam bubbles collapse.
A practical troubleshooting sequence begins with the basics: verify the gauge glass is clean and operating correctly, compare local level readings with control room readings, check feedwater pump operation, confirm the deaerator or feedwater tank level, inspect feedwater valve position, check pump suction pressure, review recent blowdown activity, and confirm that automatic level controls are responding properly. If the boiler has tripped on low water, the cause must be identified before restart.
Low-water cutoff maintenance is especially important. The National Board recommends regular blowdown and cleaning, annual inspection, qualified repairs, and close adherence to the manufacturer’s maintenance schedule for low-water cutoff devices. It also warns that if a low-water cutoff frequently trips the boiler, it should not be overridden because it is a safety device. (nationalboard.org)
Feedwater issues are often connected to broader steam system problems. Excessive condensate loss, failed steam traps, leaking return lines, or poor makeup water control can increase feedwater demand and introduce more oxygen or hardness into the boiler. This can worsen corrosion and scaling. Troubleshooting should therefore include both the boiler room and the connected steam distribution system.
Q3: Why does an industrial boiler keep tripping, locking out, or failing to ignite?
A3: An industrial boiler may keep tripping, locking out, or failing to ignite because of fuel supply problems, air-fuel ratio issues, flame safeguard faults, ignition transformer failure, dirty burners, blocked fuel strainers, low gas pressure, unstable draft, combustion air restrictions, faulty sensors, control wiring issues, pressure limit trips, low water trips, or safety interlocks not proving. A lockout is not the problem itself; it is the control system stopping the burner because one or more required safe-start or safe-run conditions has not been met.
The first troubleshooting step is to record the exact alarm or lockout code before resetting anything. Repeatedly pressing reset without diagnosing the cause can create unsafe conditions, especially where unburned fuel may accumulate. Qualified burner technicians should verify the ignition sequence, pilot flame, main flame signal, fuel pressure, combustion air flow, burner linkage, draft conditions, and flame scanner operation.
Combustion-related shutdowns often appear as flame failure, pilot failure, high carbon monoxide, unstable flame, rumbling, pulsation, smoke, or delayed ignition. These symptoms can come from improper air-fuel mixture, fouled burner components, poor atomization on oil-fired units, blocked combustion air openings, fan problems, faulty dampers, or changes in fuel quality. EPA guidance states that boiler tune-ups are designed to improve combustion efficiency by balancing oxygen and unburned fuel indicators such as carbon monoxide. (US EPA)
Pressure-related trips may occur when steam demand changes rapidly, pressure controls are misadjusted, the burner modulation system is not responding, steam valves are closed, or the boiler is oversized for the load. High-pressure trips should be investigated carefully because pressure controls and safety valves are critical protective devices.
Water-level trips are also common. A boiler that locks out because of low water, high water, poor level signal, or feedwater control failure should not be restarted until the actual water level and control function are verified. Water carryover, foaming, or contaminated boiler water may cause unstable level readings and wet steam.
Safe troubleshooting depends on documentation. Operators should compare current readings with normal baseline data: stack temperature, oxygen, carbon monoxide, fuel pressure, steam pressure, water level, feedwater flow, blowdown rate, burner position, and alarm history. When a trip involves fuel, flame safeguard controls, combustion settings, pressure controls, or safety interlocks, the repair should be performed only by trained and authorized personnel.
Q4: How do scale, corrosion, foaming, and carryover affect boiler performance?
A4: Scale, corrosion, foaming, and carryover are water-side boiler problems that can seriously affect safety, efficiency, and reliability. They often develop gradually, so operators may first notice higher fuel consumption, unstable water level, poor steam quality, increased blowdown, tube overheating, frequent alarms, or reduced steam output.
Scale forms when hardness minerals in feedwater precipitate onto boiler heat-transfer surfaces. Even a thin scale layer can reduce heat transfer, raise metal temperature, and increase fuel use. In severe cases, scale contributes to tube overheating and tube failure. The National Board identifies hard scale on boiler tube surfaces as the most common cause of boiler tube overheating and failure, often linked to calcium and magnesium in boiler water. (nationalboard.org)
Corrosion occurs when oxygen, carbon dioxide, poor pH control, dissolved solids, or chemical imbalance attacks boiler metal. Symptoms may include pitting, rust-colored water, thinning tubes, leaks, or metal loss found during inspection. Corrosion control usually requires proper deaeration, oxygen scavenging, pH control, condensate return monitoring, and regular water testing by a qualified water treatment provider.
Foaming happens when bubbles form on the surface of boiler water, often because of high dissolved solids, oil contamination, alkalinity problems, suspended solids, or poor chemical control. Foaming can cause false level readings and moisture carryover into steam lines. Carryover occurs when boiler water solids or droplets leave with the steam. This can contaminate process equipment, damage turbines, reduce heat-transfer performance, and cause water hammer in steam piping.
The DOE steam sourcebook notes that hardness in boiler water can cause scale buildup and foaming, reducing efficiency and potentially causing tube failure. The National Board also warns that boiler water above recommended limits can cause scale, sludge, corrosion, and moisture carryover. (The Department of Energy’s Energy.gov)
Troubleshooting should include water tests for hardness, pH, conductivity, alkalinity, dissolved oxygen, sulfite or oxygen scavenger residual, chlorides, silica, iron, and total dissolved solids. Operators should review blowdown frequency, chemical feed operation, softener performance, deaerator temperature, condensate return quality, and makeup water percentage. Corrective action may include adjusting blowdown, repairing the softener, cleaning feedwater systems, improving condensate treatment, or performing professional chemical cleaning when approved.
Q5: How can maintenance teams prevent recurring boiler problems?
A5: Maintenance teams can prevent recurring industrial boiler problems by combining daily operator checks, proper water treatment, burner tune-ups, safety device testing, inspection planning, and data-based troubleshooting. The goal is not only to fix symptoms but also to identify the root cause behind repeated trips, efficiency losses, tube failures, pressure instability, or poor steam quality.
A strong boiler maintenance program starts with routine inspections. Operators should track water level, steam pressure, feedwater temperature, stack temperature, fuel pressure, flame appearance, oxygen and carbon monoxide readings, conductivity, blowdown activity, pump performance, chemical feed rate, and unusual noises or leaks. Trend data makes troubleshooting easier because teams can compare current performance against normal baselines.
Water treatment is one of the most important preventive measures. Regular testing helps prevent scale, corrosion, foaming, sludge, and carryover. Maintenance teams should verify softener operation, deaerator performance, chemical dosing, condensate return quality, and blowdown control. Insufficient blowdown can allow solids to concentrate, while excessive blowdown wastes heat, water, and treatment chemicals.
Combustion maintenance is also essential. Burners should be inspected, cleaned, and tuned by qualified technicians. Combustion air openings, fans, dampers, fuel valves, linkages, scanners, and control systems should be checked for proper operation. EPA guidance describes boiler tune-ups as a way to improve combustion efficiency, reduce wasted fuel, and maintain safer operation. (US EPA)
Safety devices require disciplined testing. Low-water cutoffs, pressure controls, flame safeguards, safety valves, interlocks, alarms, and emergency shutdown systems should be tested according to manufacturer instructions, jurisdictional requirements, and facility procedures. The National Board emphasizes that public safety depends on proper boiler maintenance and inspection because boilers and pressure vessels contain significant stored energy. (nationalboard.org)
Recurring problems should be handled with root cause analysis. For example, repeated low-water trips may point to feedwater pump cavitation, deaerator issues, failed steam traps, excessive blowdown, or unstable load swings. Repeated tube leaks may indicate scale, oxygen corrosion, thermal stress, poor water chemistry, flame impingement, or improper warm-up. Repeated burner lockouts may indicate fuel pressure instability, flame detection issues, dirty burner parts, or incorrect combustion setup.
Repairs involving pressure parts, safety valves, burners, control circuits, or code-related components should be assigned to qualified boiler professionals. In many cases, certified repair organizations and inspectors are required.
References
- CIBO Energy Efficiency Handbook — https://www.energy.gov/sites/prod/files/2014/05/f15/steamhandbook.pdf — U.S. Department of Energy
- Improving Steam System Performance: A Sourcebook for Industry — https://www.energy.gov/sites/prod/files/2014/05/f15/steamsourcebook.pdf — U.S. Department of Energy
- Boiler Tune-up Guide — https://www.epa.gov/sites/default/files/2021-03/documents/tune-up_guide_revised_0.pdf — U.S. Environmental Protection Agency
- Boiler Tune-ups: Improve Efficiency, Reduce Pollution, and Save Money — https://nepis.epa.gov/Exe/ZyPURL.cgi?Dockey=P100TOFG.TXT — U.S. Environmental Protection Agency
- How to Destroy a Boiler — Part 1 — https://www.nationalboard.org/index.aspx?ID=238&pageID=164 — National Board of Boiler and Pressure Vessel Inspectors
- Low-Water Cutoff: A Maintenance Must — https://www.nationalboard.org/index.aspx?ID=220&pageID=164 — National Board of Boiler and Pressure Vessel Inspectors
- Low Water Cut-Off Technology — https://www.nationalboard.org/index.aspx?ID=237&pageID=164 — National Board of Boiler and Pressure Vessel Inspectors
- Water Maintenance Essential to Prevent Boiler Scaling — https://www.nationalboard.org/index.aspx?ID=224&pageID=164 — National Board of Boiler and Pressure Vessel Inspectors
- How to Destroy a Boiler — Part 3 — https://www.nationalboard.org/index.aspx?ID=244&pageID=164 — National Board of Boiler and Pressure Vessel Inspectors
- ASME Boiler and Pressure Vessel Certification — https://www.asme.org/certification-accreditation/boiler-and-pressure-vessel-certification — ASME
Industrial Boiler Problems: Troubleshooting Guide Tips Read More »